What is Microsoft Teams?
A familiar problem employees face, especially considering the Coronavirus pandemic, is a multitude of communication platforms necessary to get work done. Using siloed technologies for video calls and meetings, collaborative web spaces, and instant messaging systems makes for a disjointed virtual office. It may be difficult for staff to determine which platform will host meetings or calls. A key contributor may not remember if they shared a file via Slack, Discord, or Google Drive. Companies need a central hub for collaboration and communication to maximize their efficiency and reduce errors.
Microsoft Teams offers a holistic workspace platform that encourages synergy and conversation. Users can access files and apps from within Teams, send messages to cohorts, jointly edit documents, hold and record meetings, and manage projects and groups. In addition to these powerful functionalities, Teams can integrate with third-party and Microsoft Power Platform apps to bring extra value to businesses.
This post will cover how to install Teams, create your first group, collaborate with your colleagues, and integrate with the Power Platform.
- Install Teams
- Create your first “team”
- Collaborate with colleagues
- Integrating Teams with Power Platform
Step 1: Install Teams
Microsoft 365 for business users should already have Teams available for download. Microsoft Teams is included in the Business Basic, Business Standard, and Business Premium Microsoft 365 plans. It’s important to note that Teams is not available with the Microsoft 365 Apps for Business plan. However, you can get a free copy of Microsoft Teams here.
Users with Microsoft 365 business basic plans can navigate to the mobile Teams app by clicking here. For other plans, navigate to http://www.microsoft365.com/ site and click on the “Install apps” button in the upper right corner. Follow the download instructions until Teams is successfully installed. You can also click the Teams icon in the left sidebar.
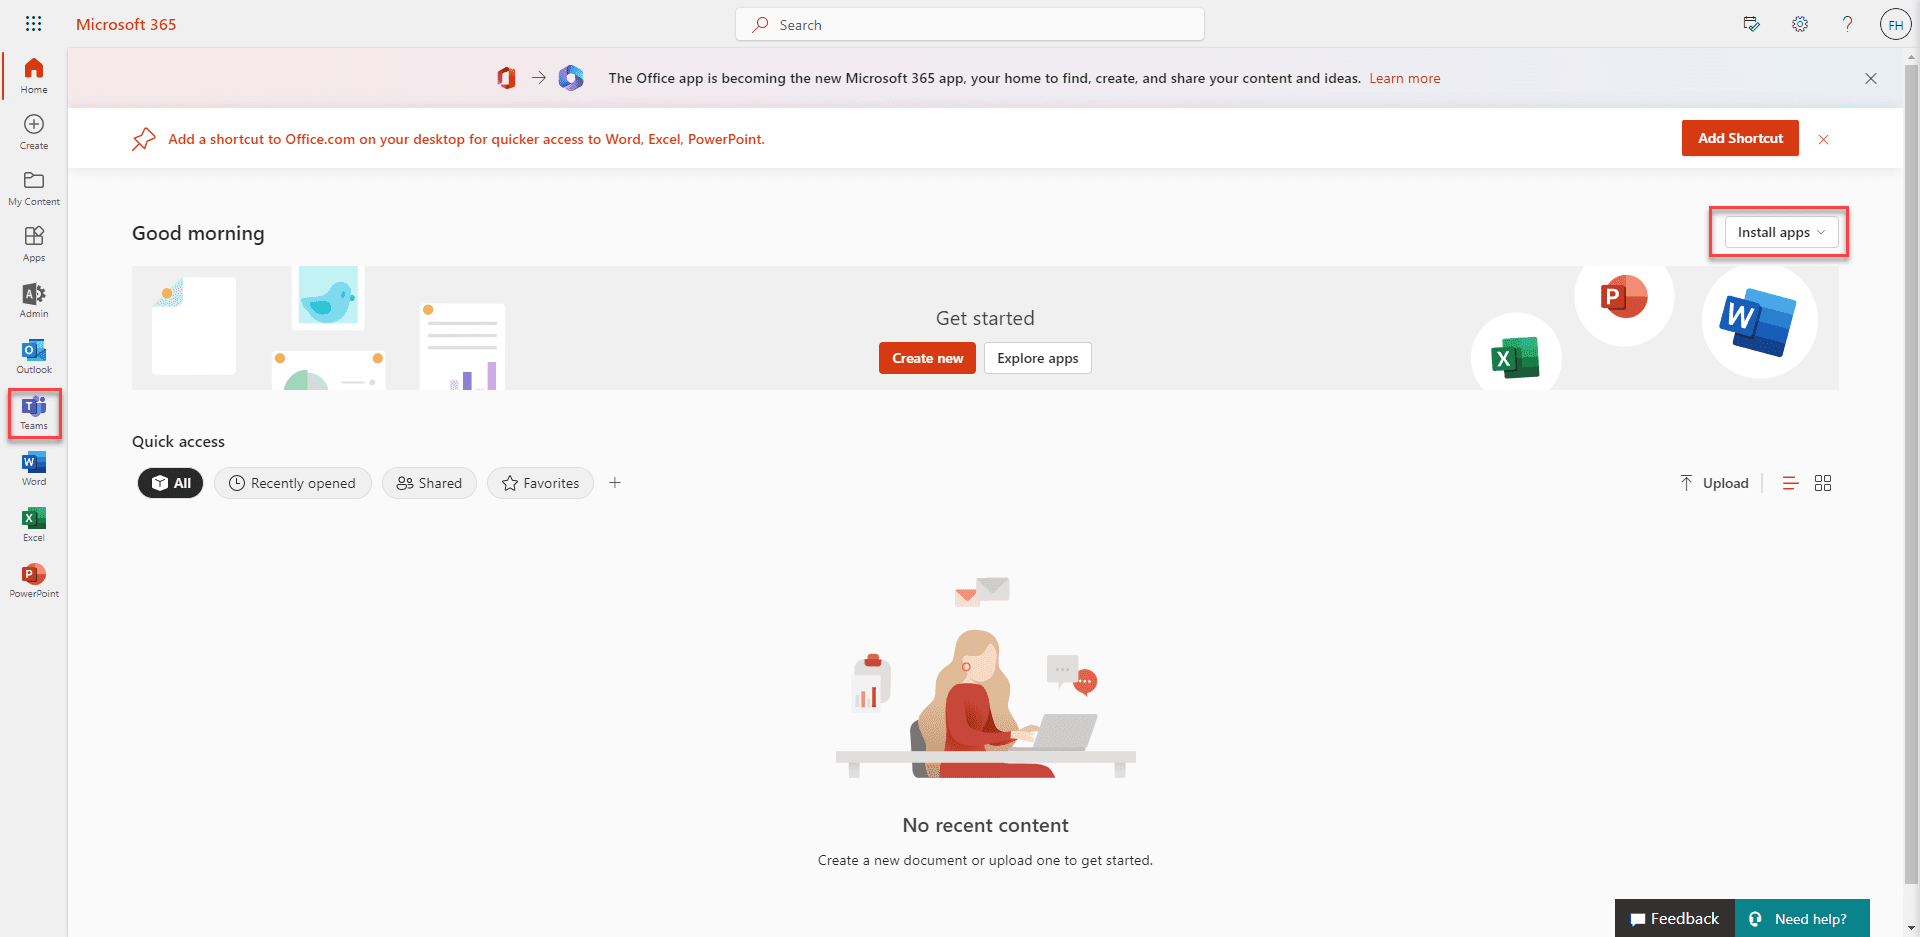
Step 2: Create your First “Team”
After either downloading the desktop app or clicking on the mobile app, Teams will start up. As the installation user, you’ll have automatic Teams admin permissions. Now you can begin creating “Teams” for specific groups. To set up a “team,” you’ll need more than one user. Click this link to learn how to add users to your organization.
First, click on the “Admin” icon on the left bar. This will take you to the admin center within Teams. Next, click the “Teams” button. Then click the “Add a team” button to open the team creation panel.
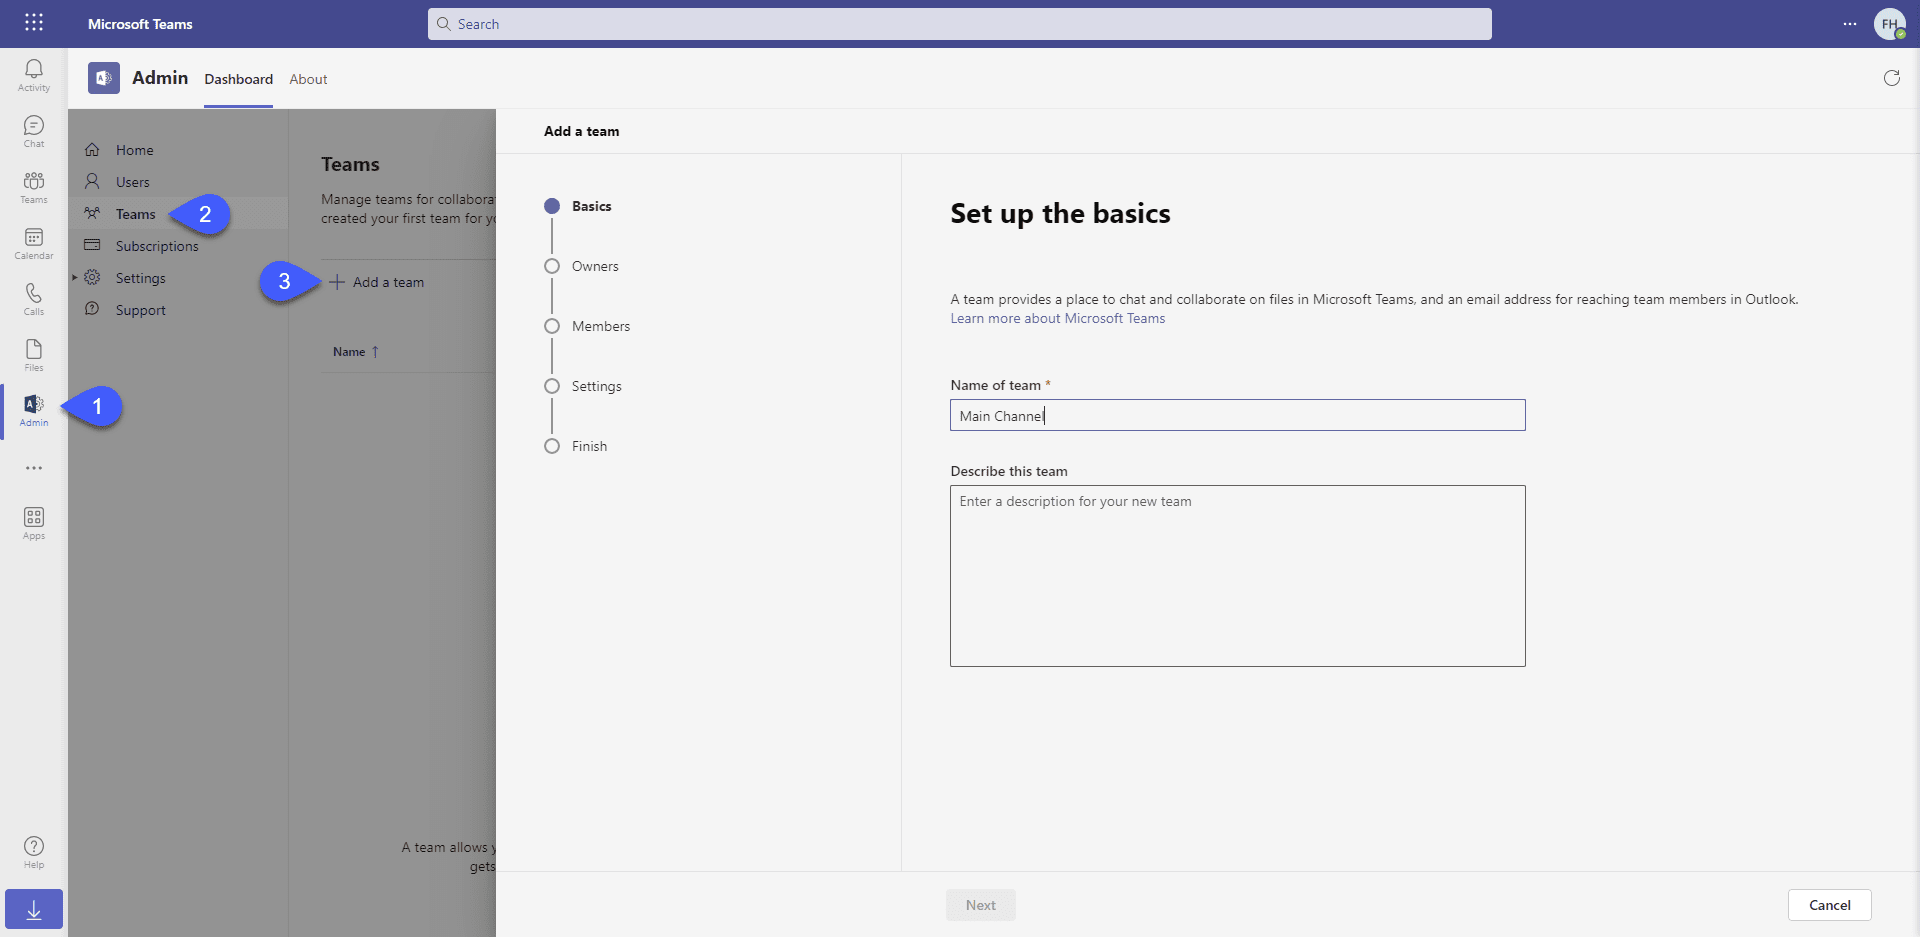
From here, you give the team a name, describe its purpose, and assign a team “owner.” Make sure that the user you choose to own the team has Teams Admin permissions. Then you can select the members of that team based on the purpose of the Team, permission levels, or other factors that suit your business needs.
Finally, you’ll configure this team’s settings, including determining a team email and privacy settings. Teams can be public or private within your organization, depending on the sensitivity of the information communicated therein. The team email creates an email group that team members have access to. Thus, if a user emails the team email address, all team members receive the message in their group folder within Outlook.
Step 3: Collaboration with Colleagues
Now that you’ve created a team, you can utilize features that make working together easy and effective. Click on the “Teams” icon on the left bar to see your team page.
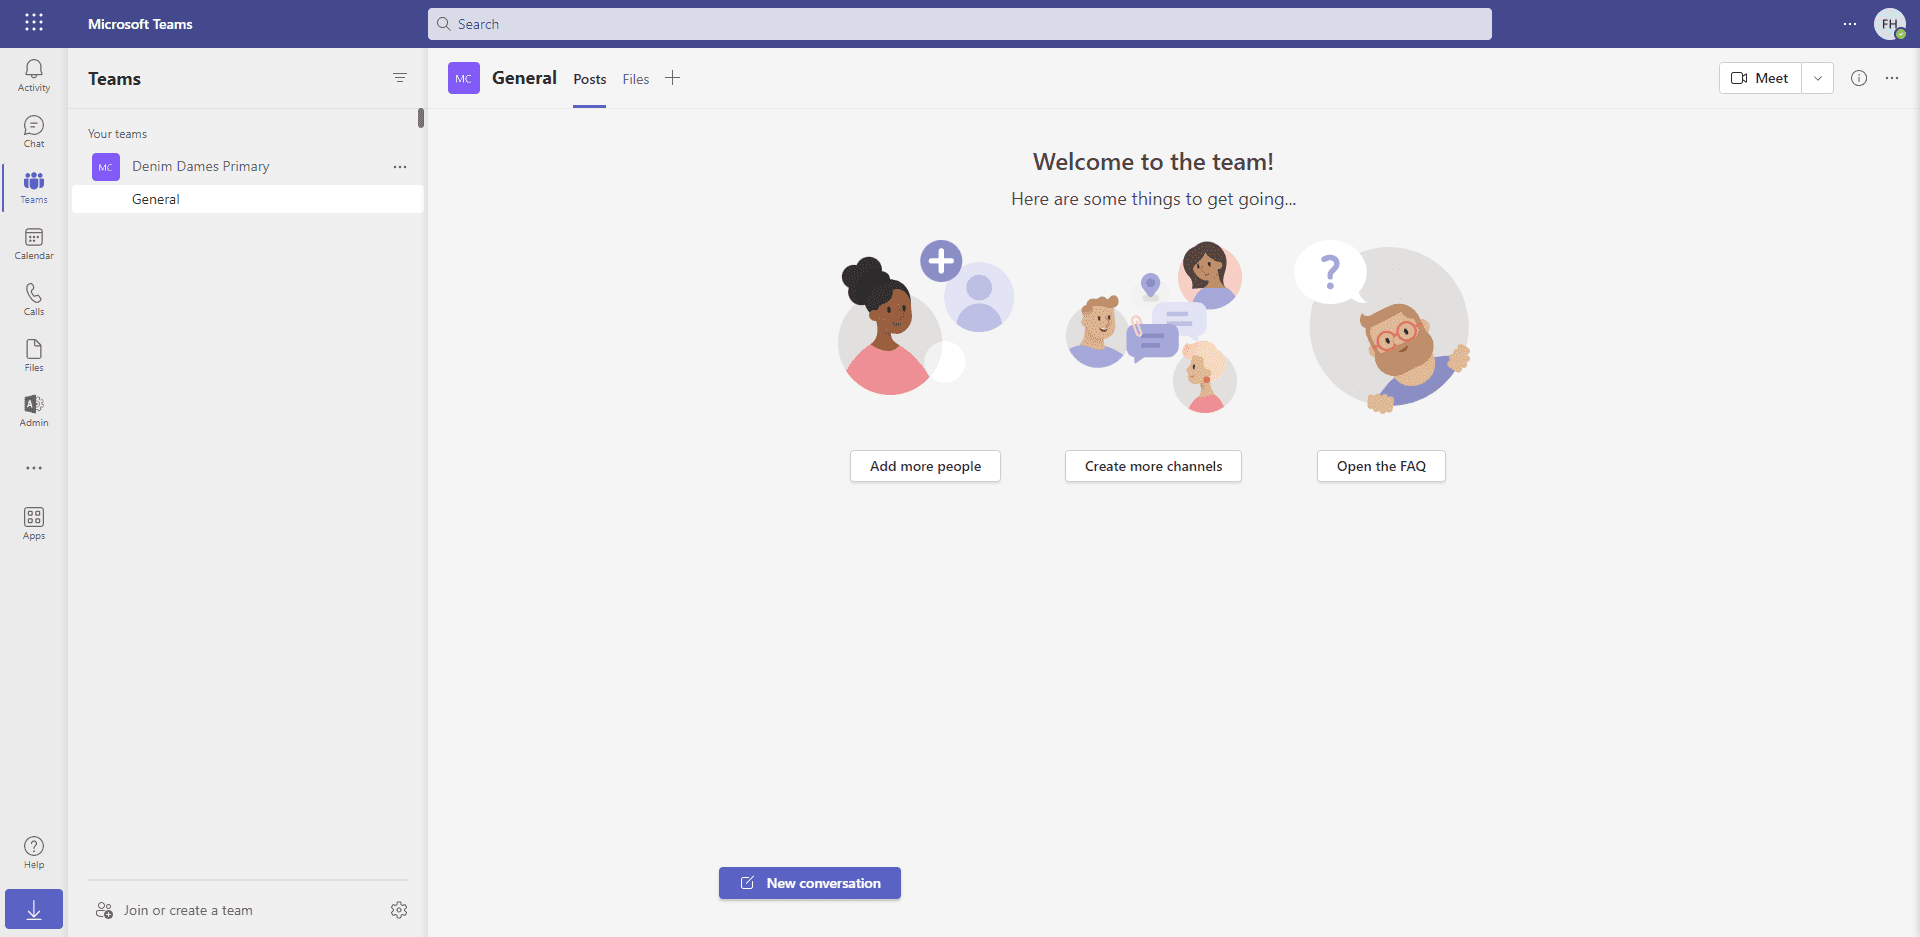
This tab can serve as a central communication hub for your entire team. You can initiate instant message conversations, call an “all hands” meeting, schedule future meetings, and share and store files. But one of Team’s most impressive capabilities is held in the “+” button at the top of the page.
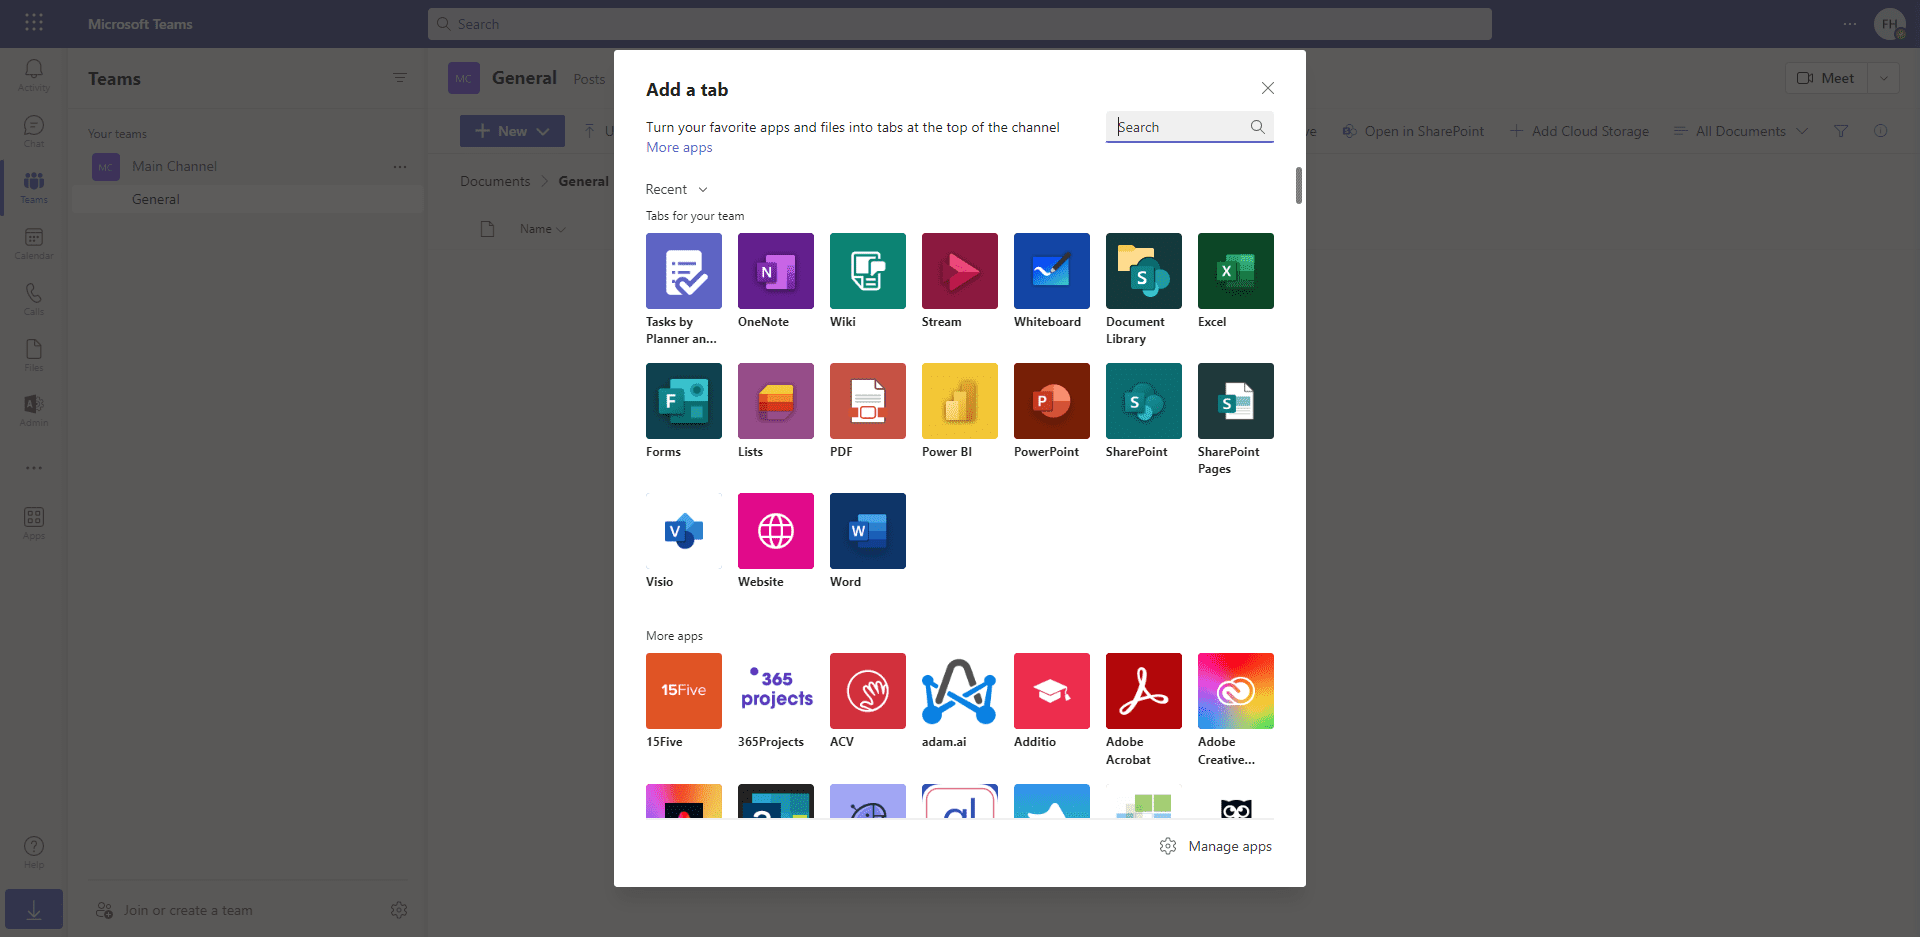
The “+” or “Add tabs” button allows users to integrate over 700 different Microsoft and third-party apps within Teams. Groups can create joint task lists, access SharePoint documents, create and edit word documents in real-time, and much more. Or browse the extensive app library by clicking the “Apps” icon in the left sidebar.
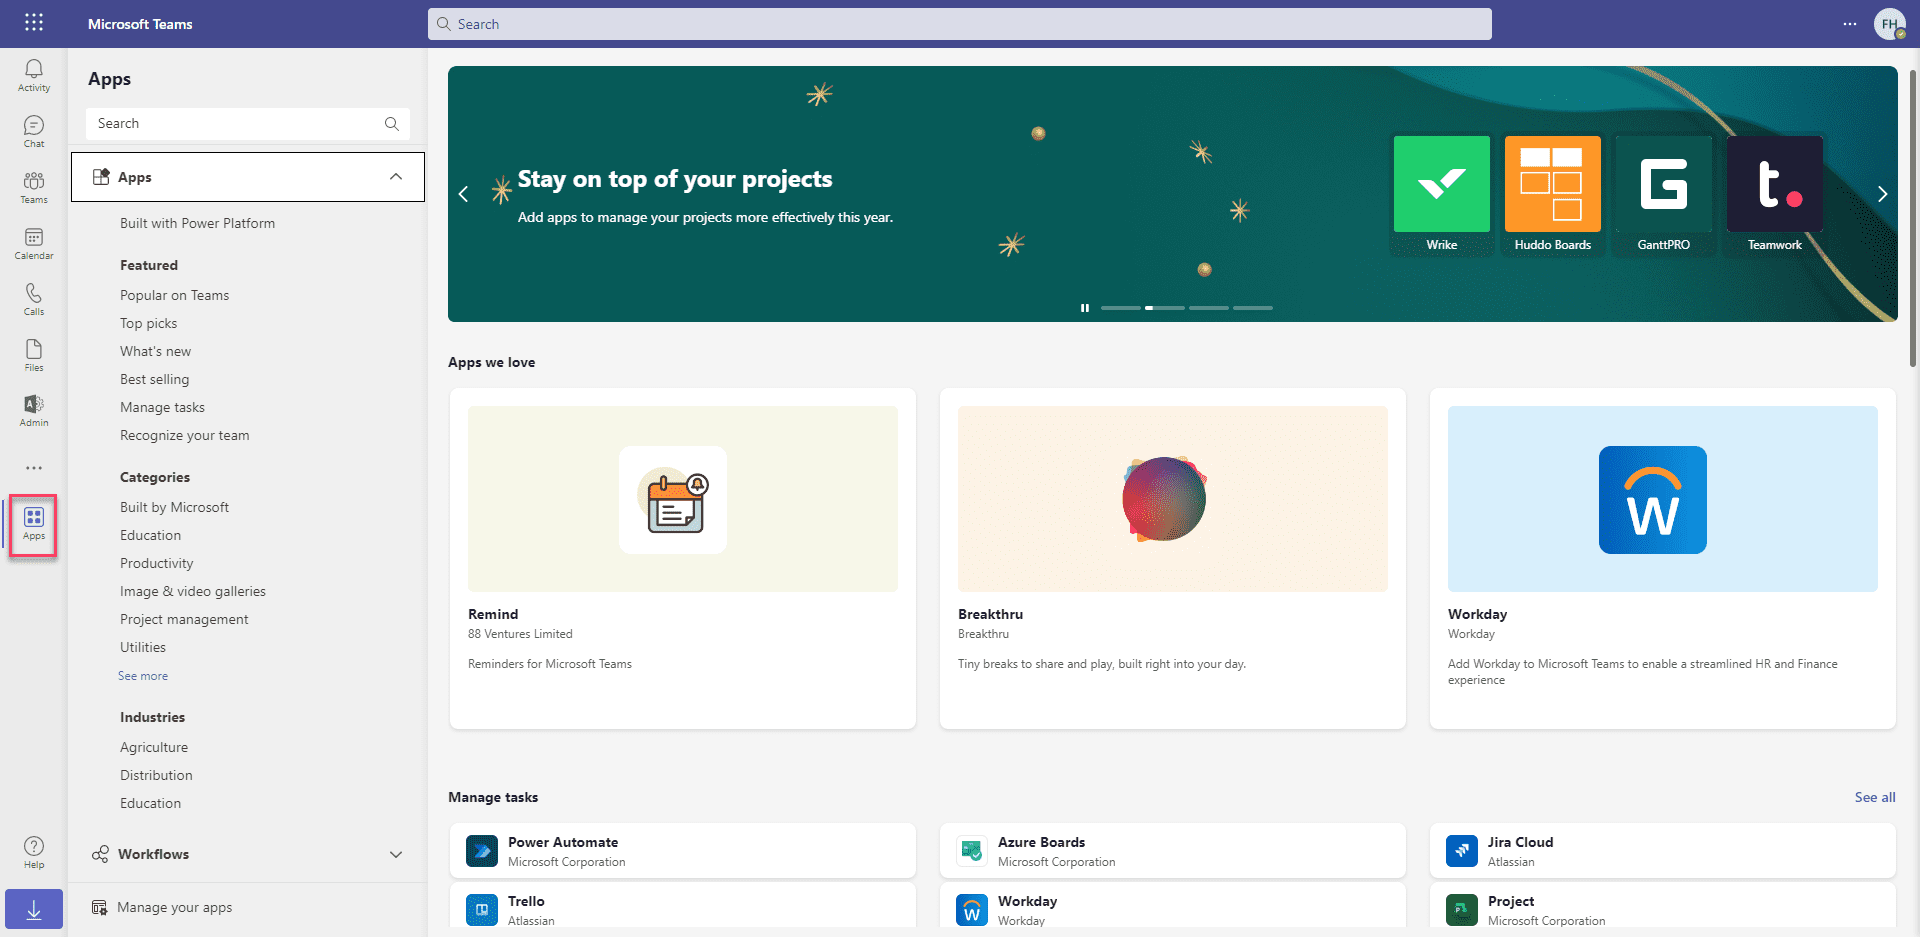
Step 4: Integrating Teams with Power Platform
Microsoft Teams is also an excellent platform for creating, editing, sharing, and testing Power Platform objects. You can find these apps simply by searching for “Power” in the “Apps” tab.
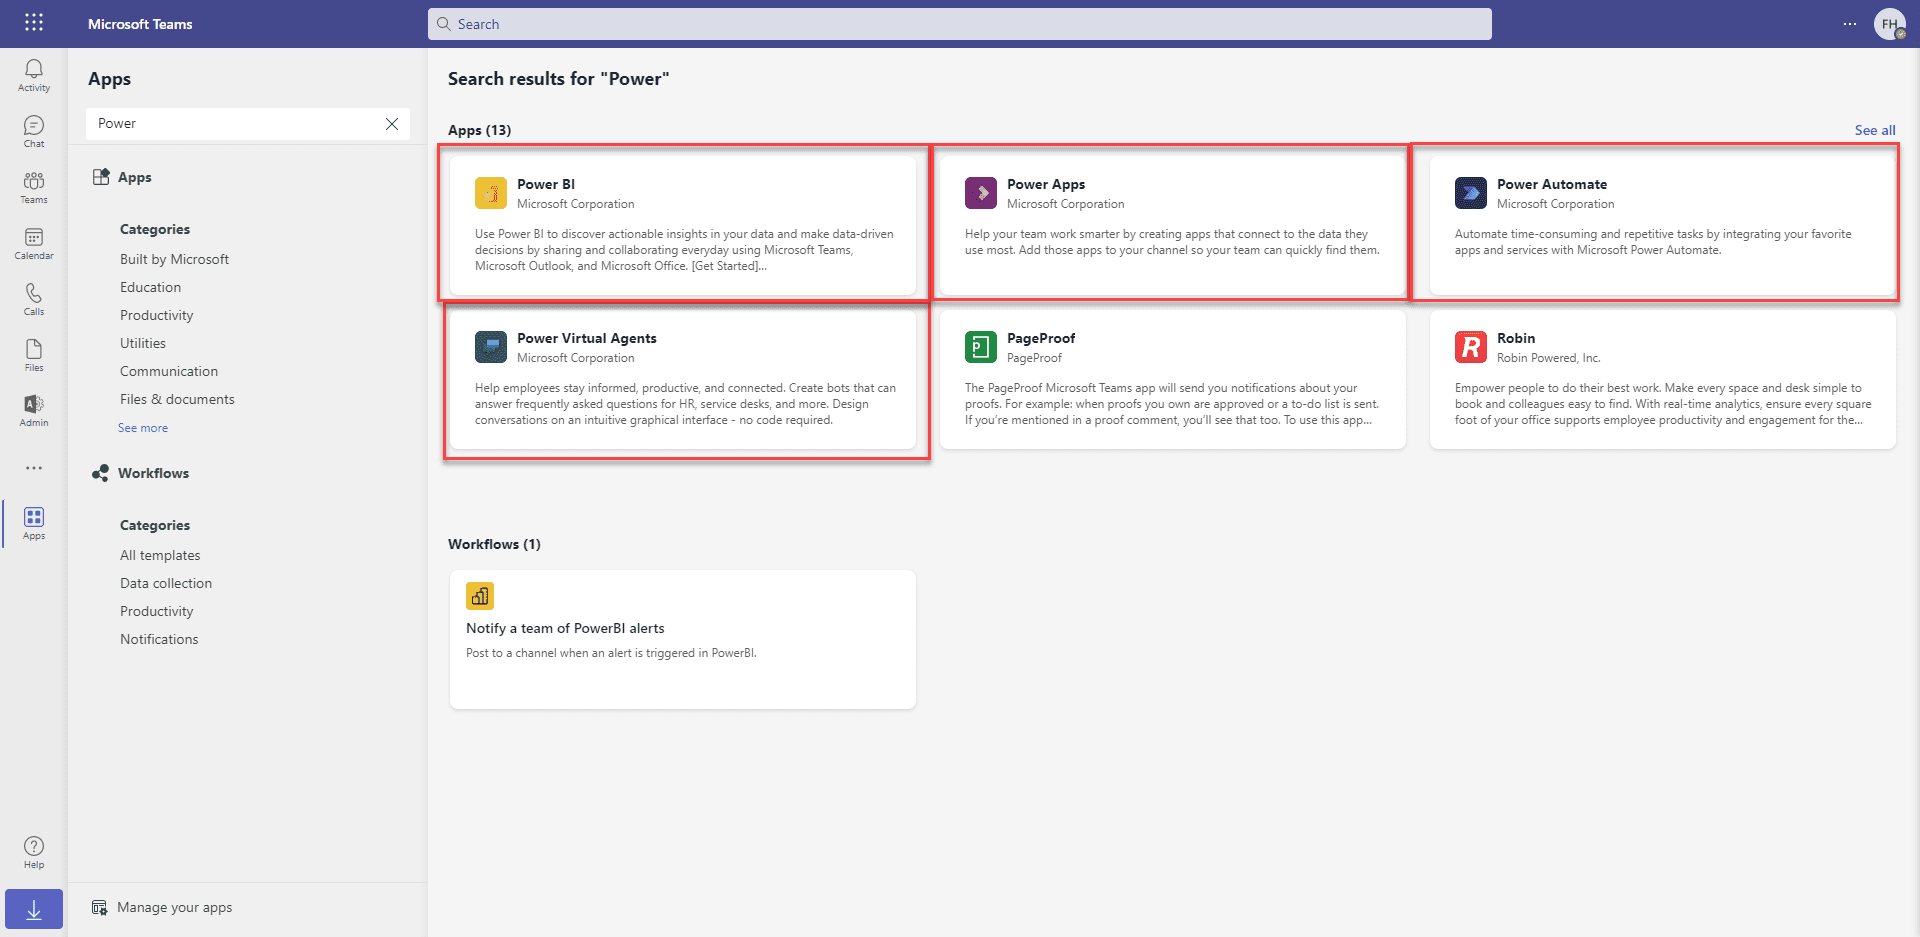
Adding an app is easy. Click on the Power Platform app you wish to run in Teams, then click the “Add” button. You can also click the “⌄” button to choose whether you’d like to add the app to a team, a chat between several coworkers, or a meeting
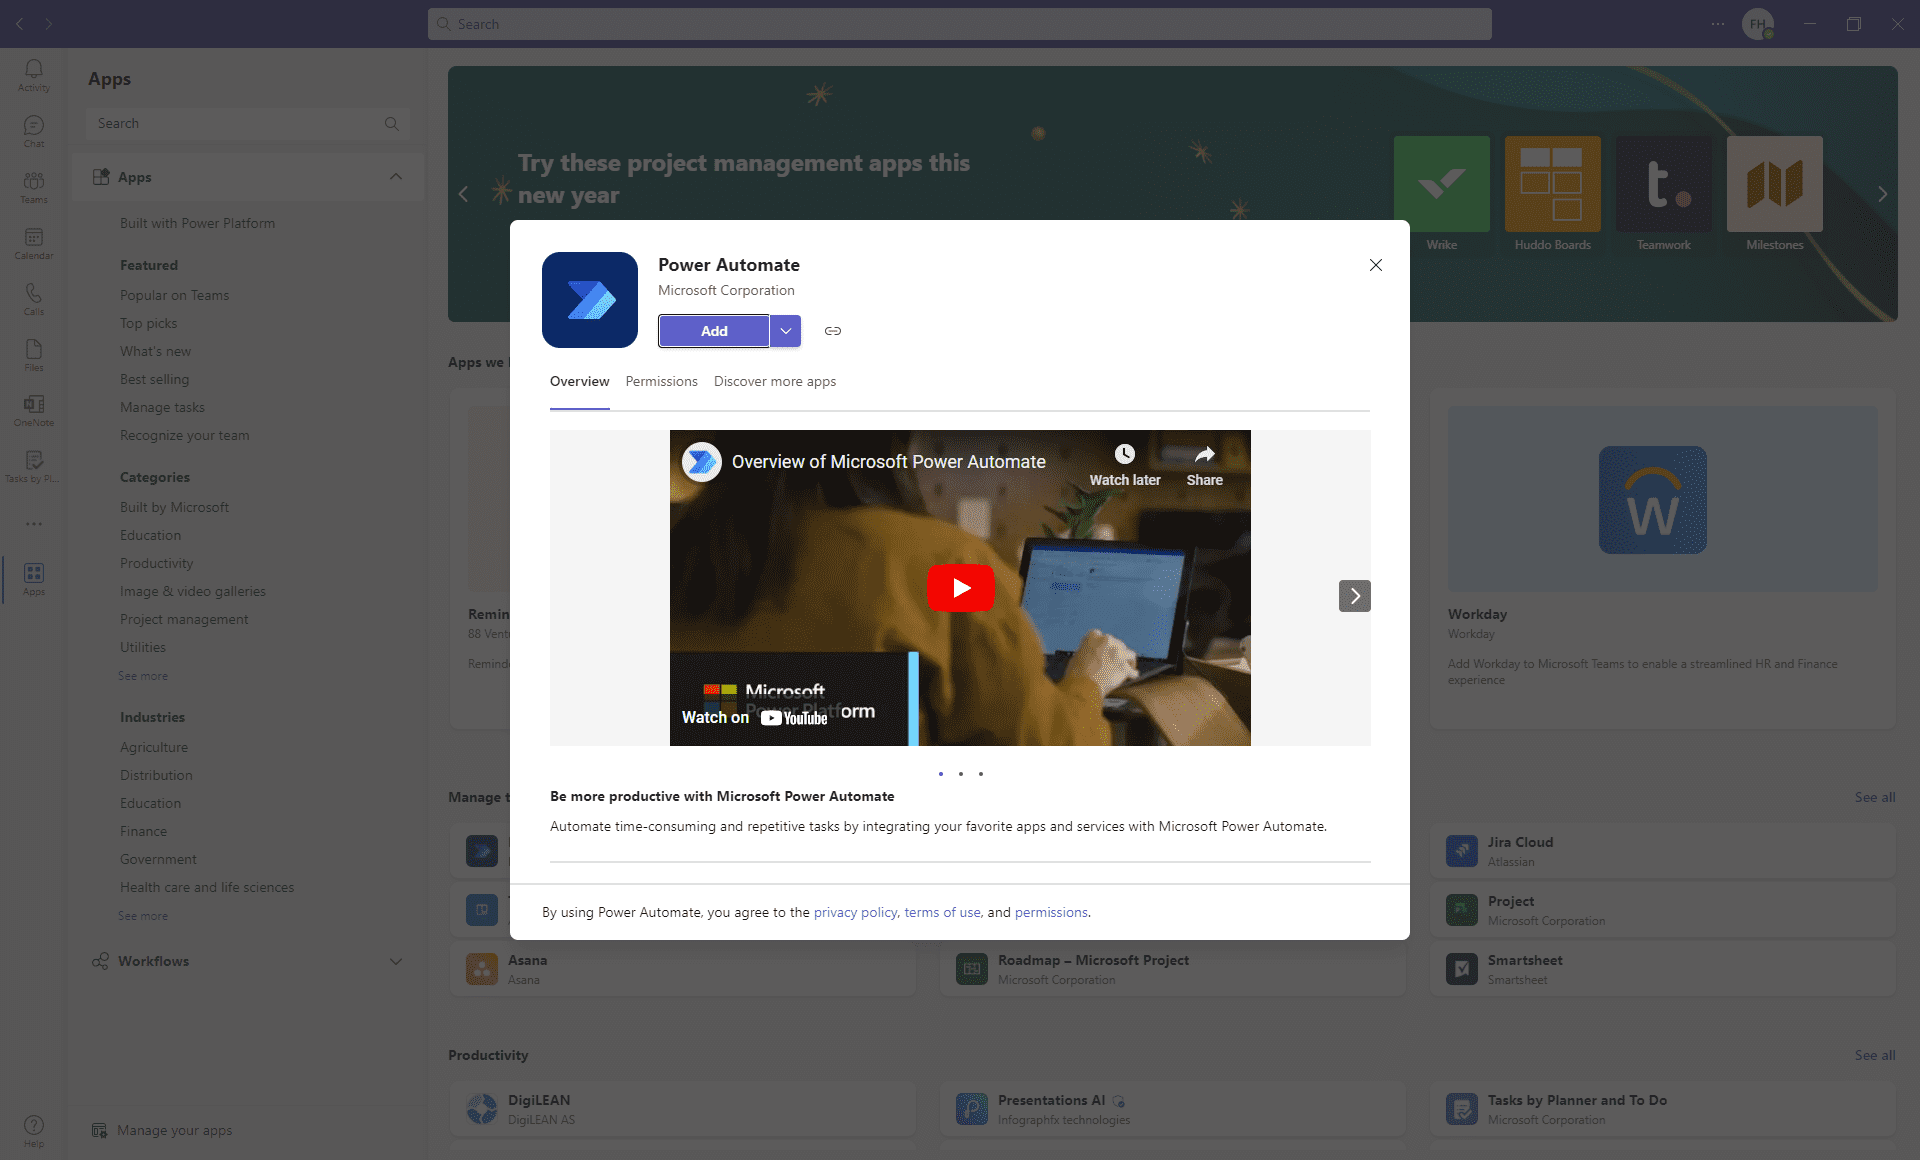
When any of the Power Platform apps are installed in Teams, a new Dataverse for Teams is created. The Dataverse is team specific, so your private and public groups will have separate Dataverse for Teams environments. To learn more about the Power Platform Dataverse, click here.
Power Automate in Teams
Launching Power Automate in Teams allows you to create flows based on Team’s behaviors. In the “Home” tab at the top of the screen, you’ll see all of the flows you’ve created. By clicking the “Create” tab, you’ll see common flows that can follow up on messages, schedule meetings, complete planner tasks, and more. You can create a custom flow by clicking the “Create from blank” button on the top right.
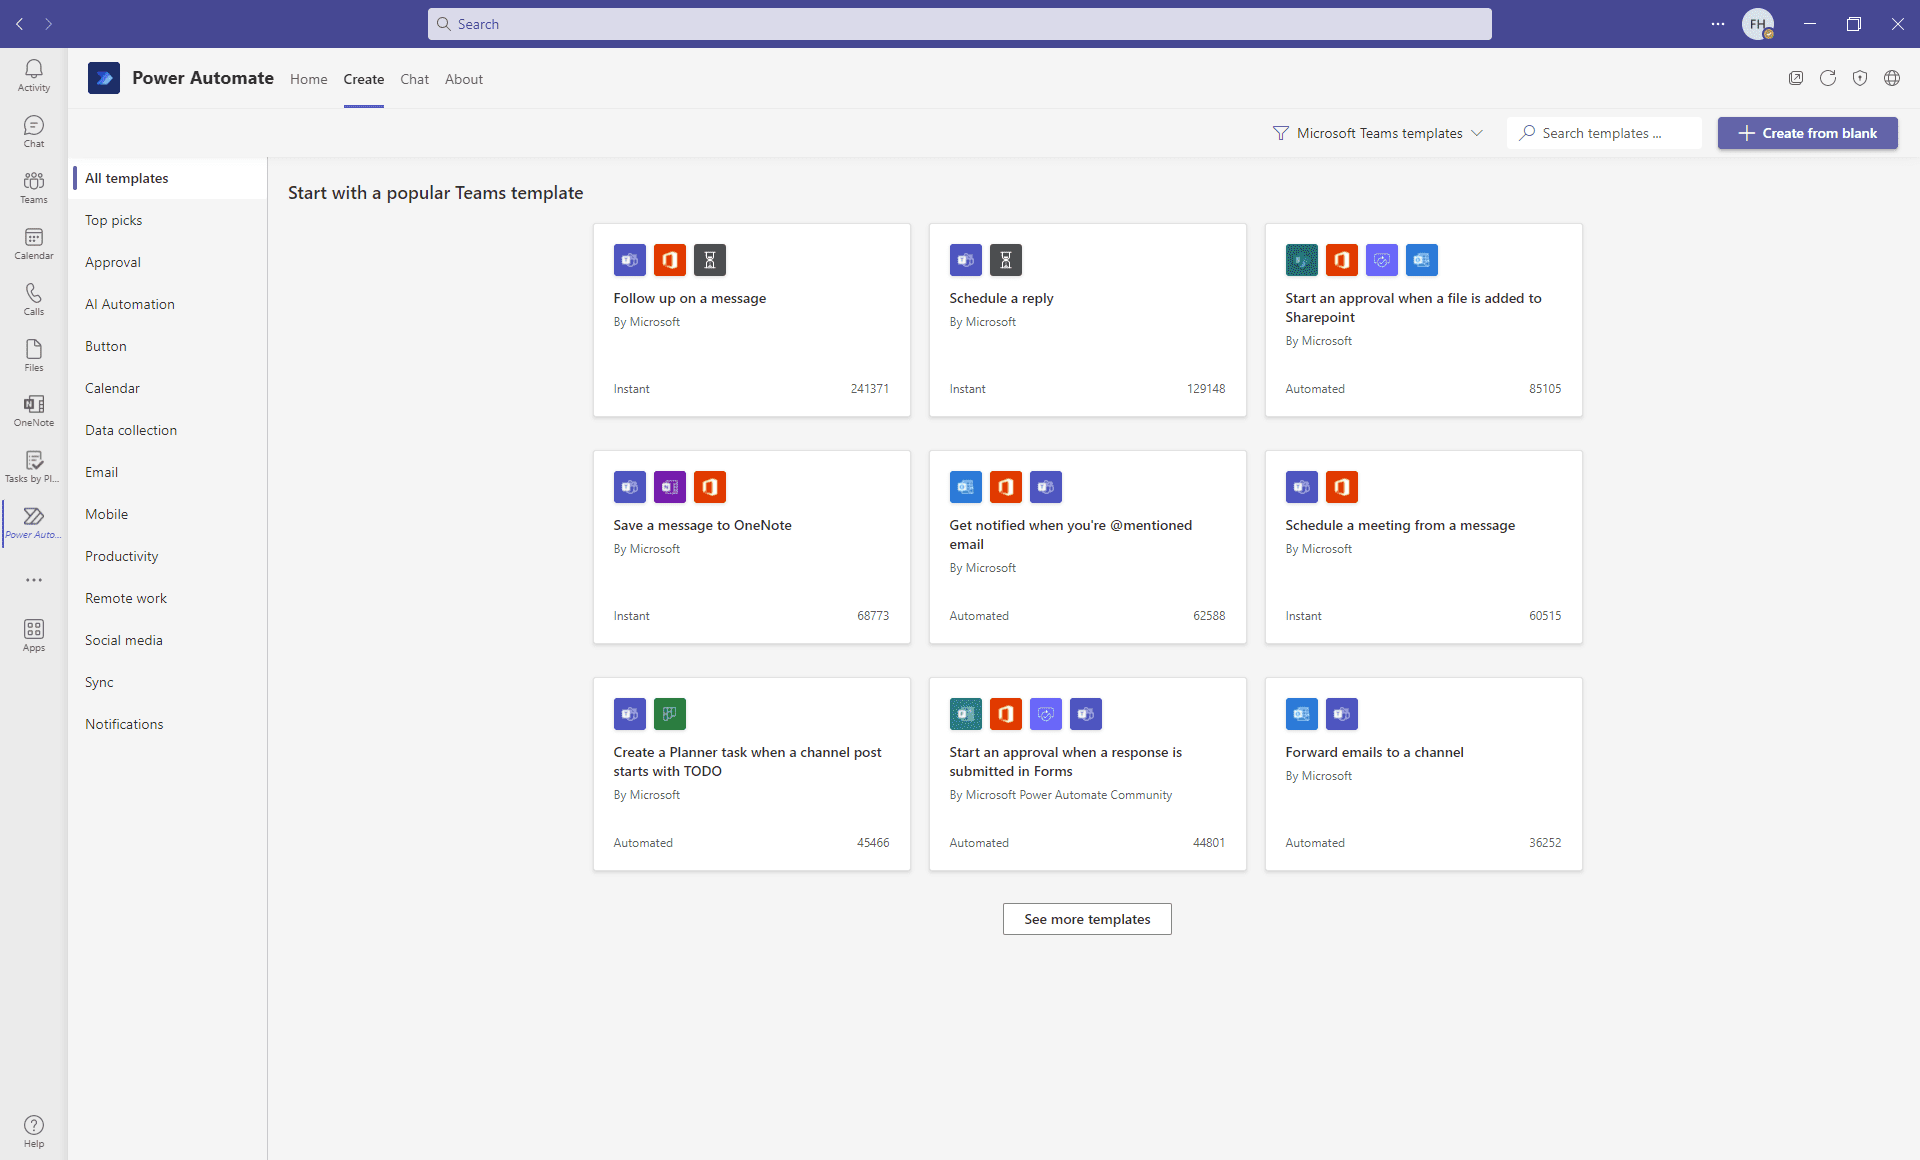
Power BI in Teams
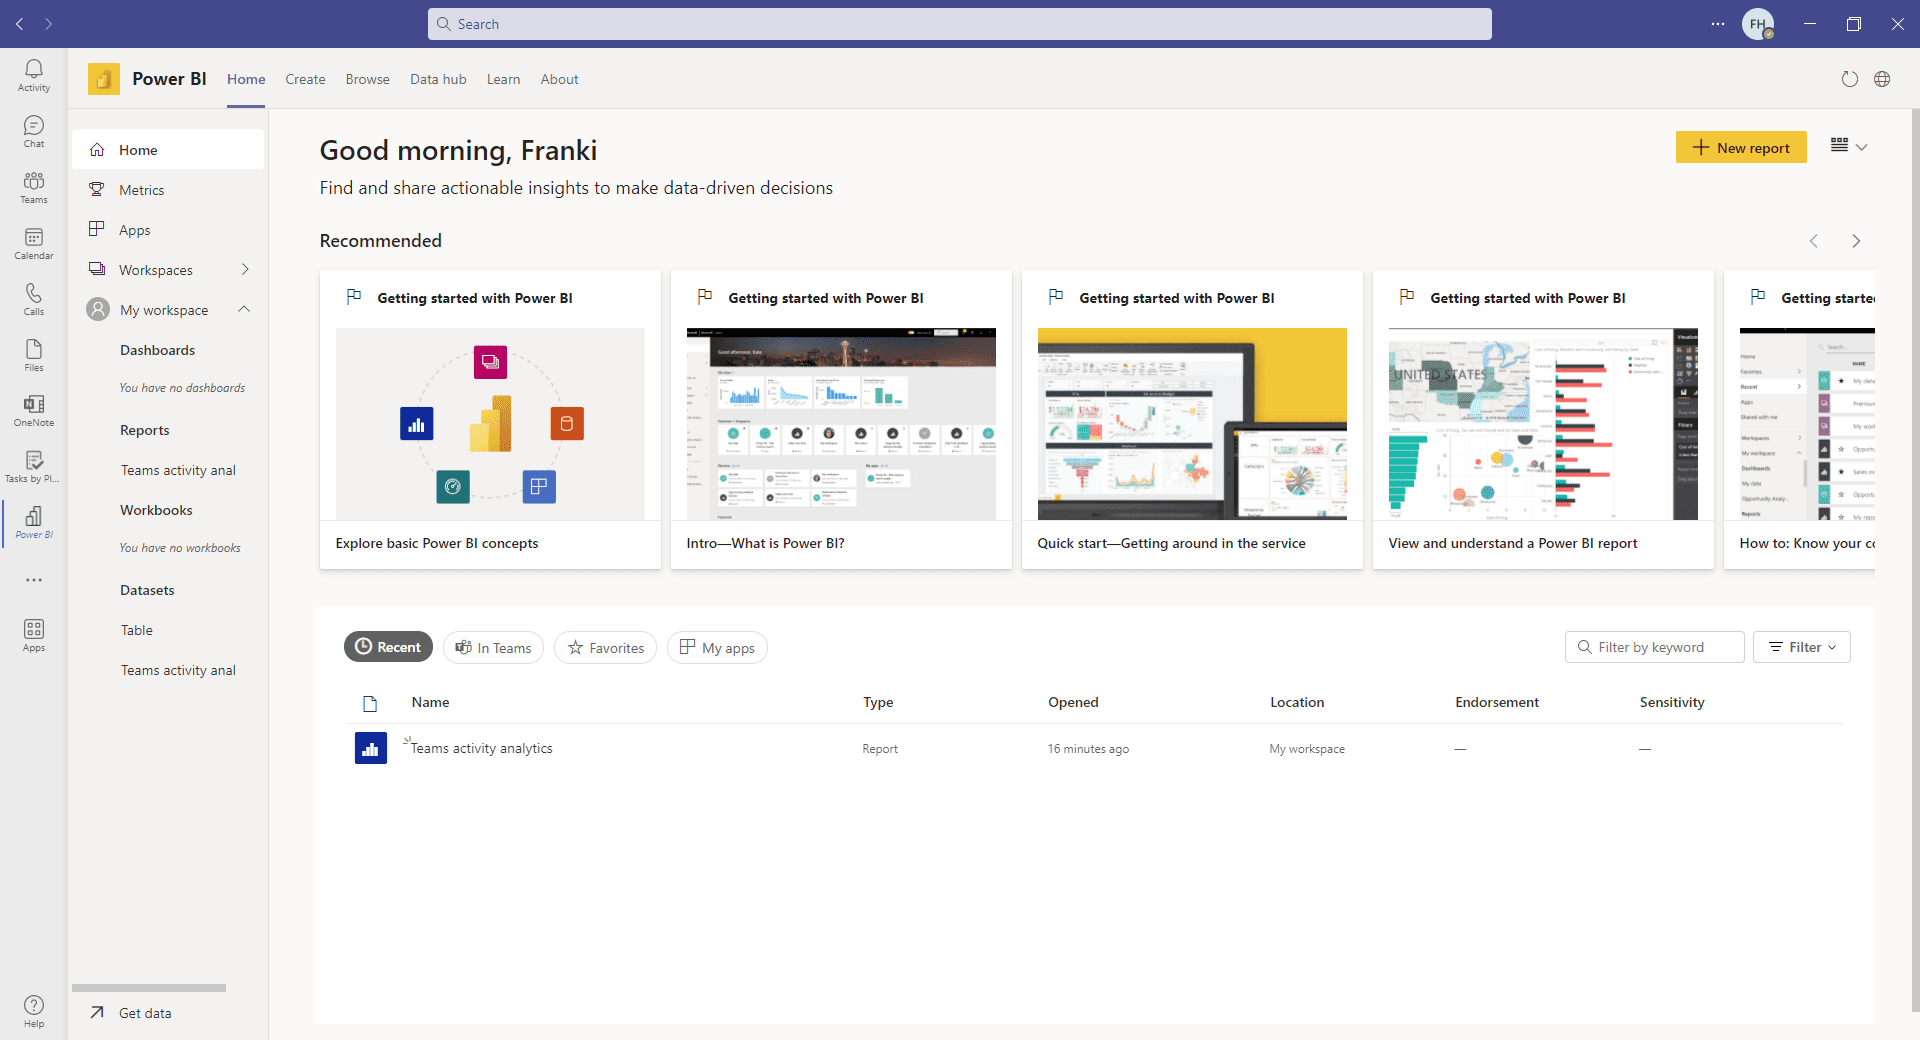
Like Power Automate, Power BI in Teams comes with several prebuilt options for creating data visualizations. Your Power BI “Home” tab will contain all the data sets, scorecards, and other items you make. In the “Create” tab, you can create new charts based on pasted data, pick a published data set, or analyze your Teams data.
Power Apps in Teams
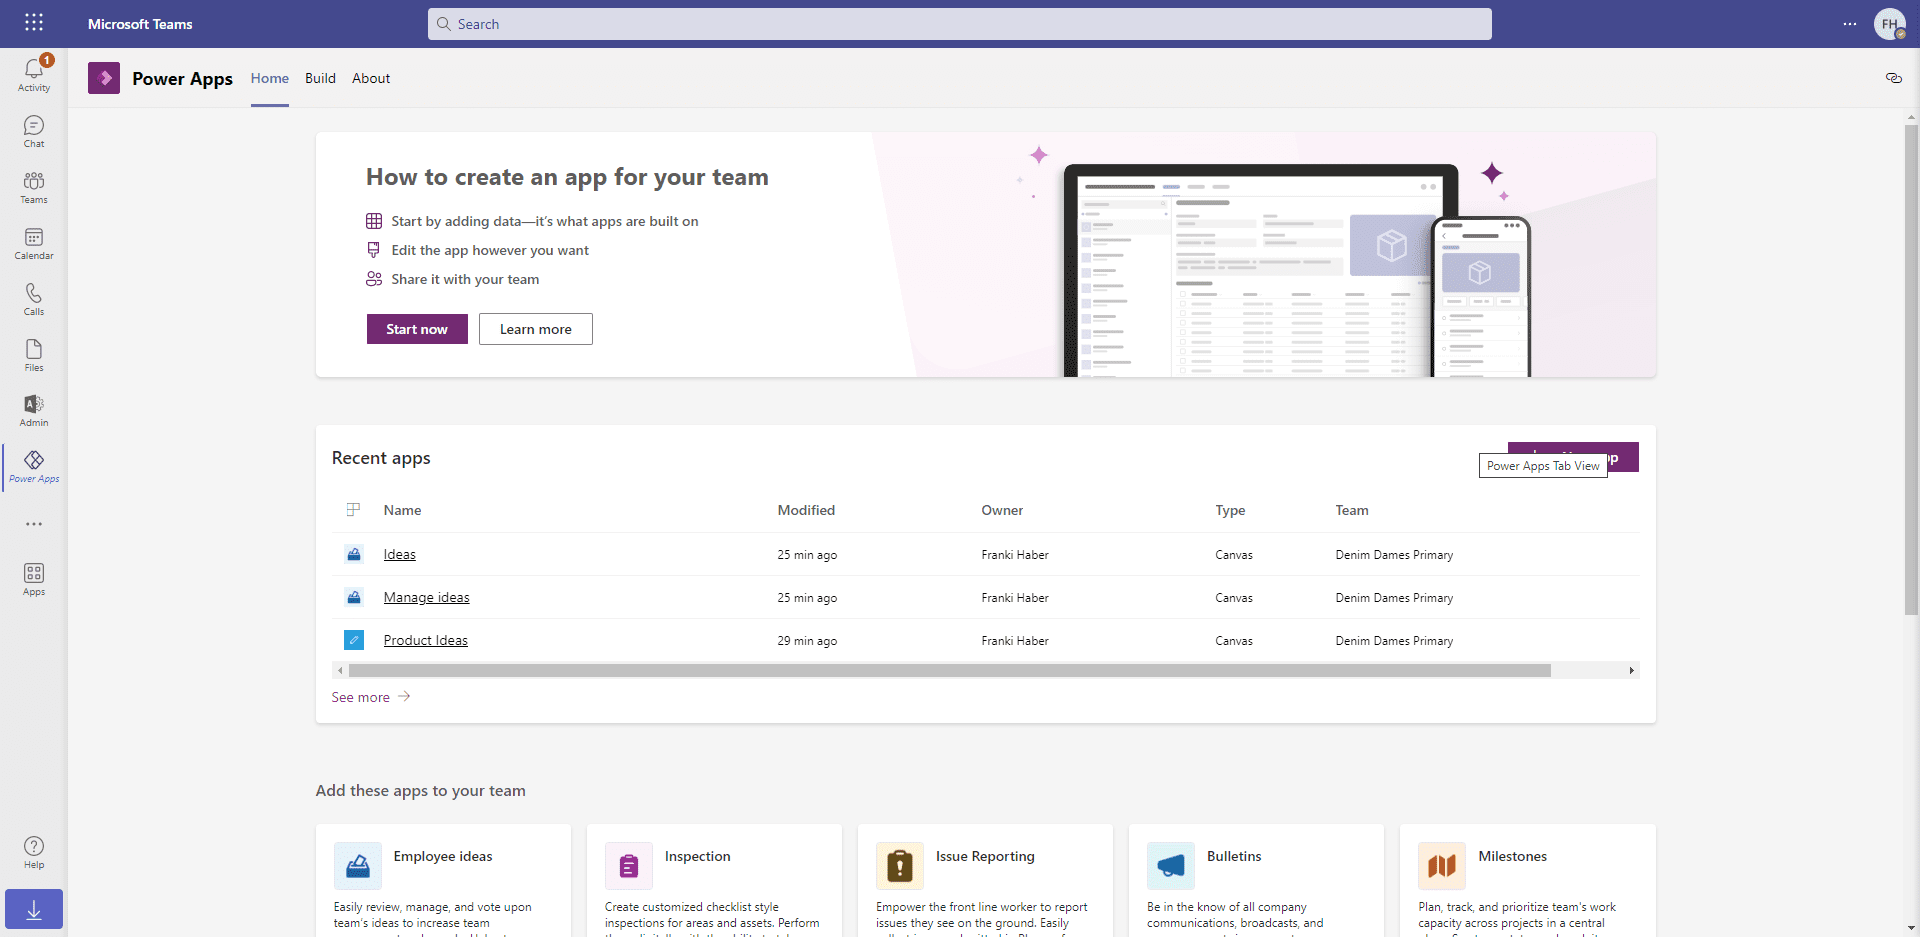
It’s handy to create Power Apps within Teams. Users can create internal apps that only require Teams to function correctly. Apps can be assigned to specific teams and edited with the built-in Power Apps Studio. Microsoft has included prebuilt templates for familiar Teams workflows and operations. These templates are easily editable to suit your specific team’s needs.
Power Virtual Agents in Teams
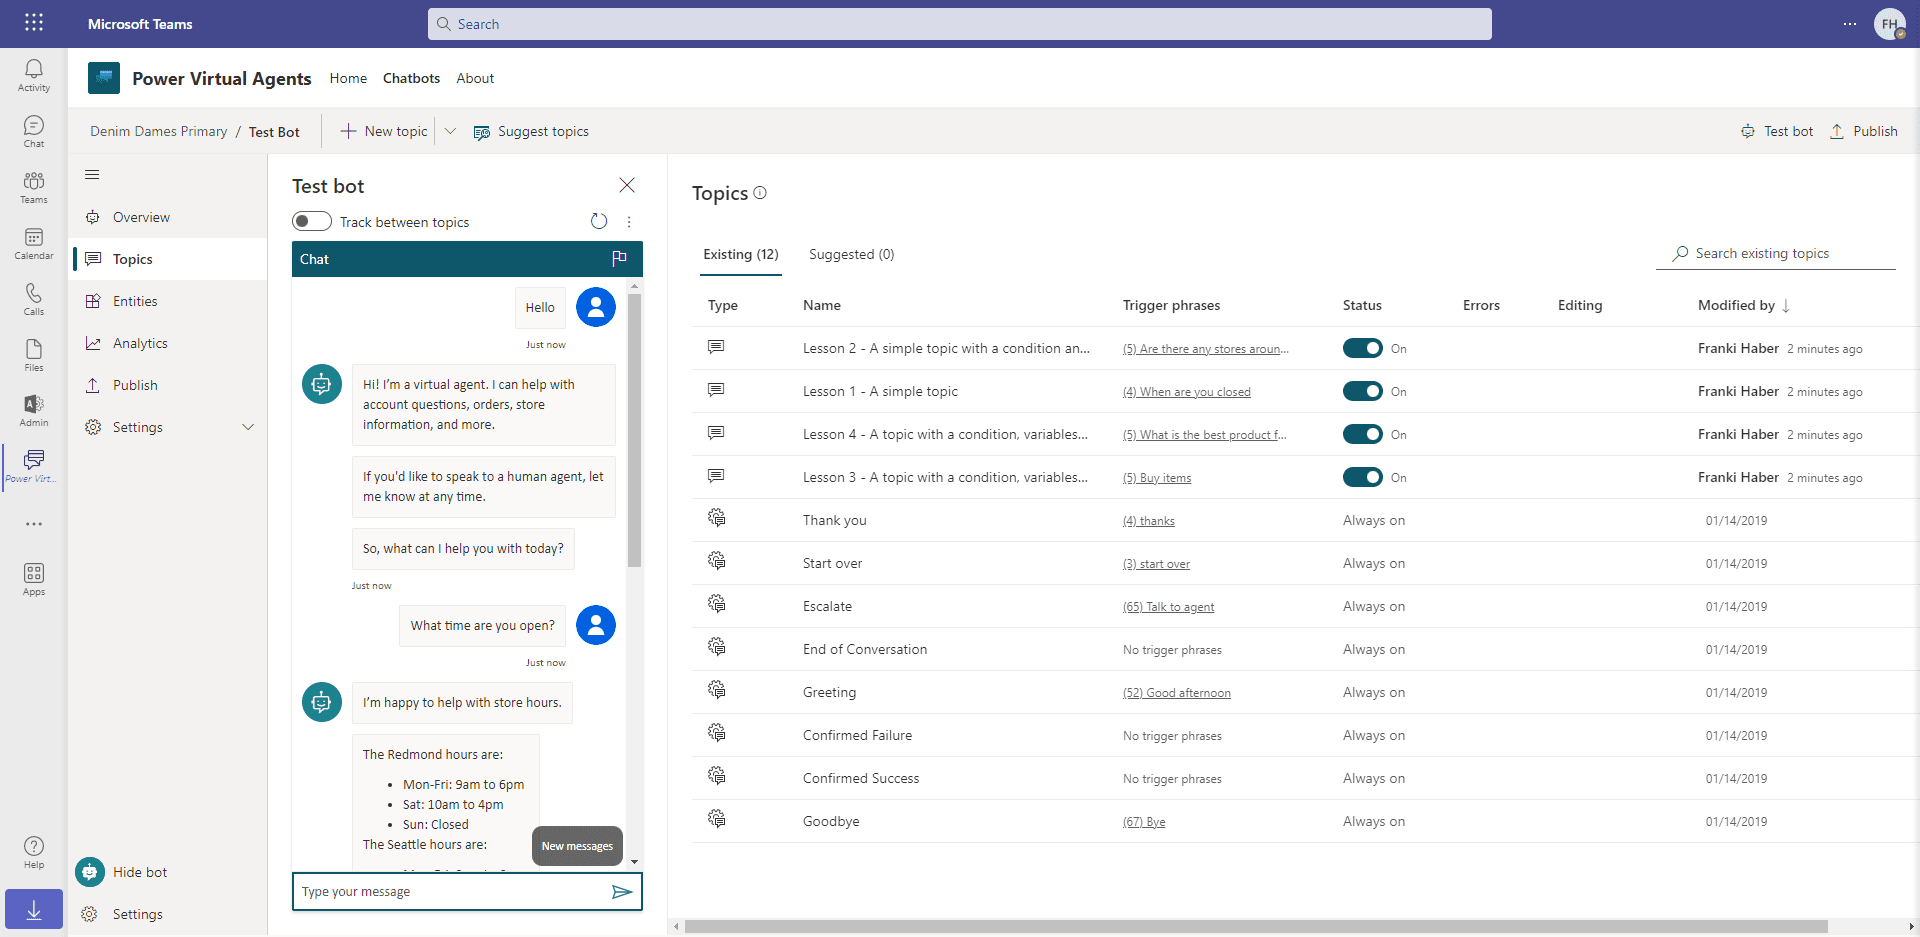
Teams is the perfect testing ground for any chatbots your company may deploy. Users can develop, test, and share their chatbots with team members. These chatbots can be used for internal purposes, such as answering common HR questions, or published externally for customer use. And if you install the “Developer Portal” app, you can post apps created in Power Virtual Agents to Teams.
Conclusion
Microsoft Teams is a powerhouse of communication and productivity. Its intuitive interface and bevy of app integrations make it an obvious choice for remote or onsite workplaces. It removes siloed communication channels and improves project organization. With the addition of Power Platform integrations, Teams can be a springboard for new ideas and technological advancements within your organization.
If you have questions about getting started with Microsoft Teams or best practices for integrating Power Platform apps within Teams, reach out to EvergreenWorx today.

