
Microsoft 365 has some of the most advanced capabilities of any software suite available. However, getting the apps, licenses, and permissions associated with your business and users set up can take time and effort. This article will cover purchasing and setting up Microsoft 365 for your business.
Step 1: Selecting the right plan
Microsoft 365 provides ultra-scalable solutions to enhance any size business’s functionality. Thus, it offers many different subscription options. Microsoft 365 comes in two flavors for business owners: Business and Enterprise.
The main distinction between Microsoft 365 for Business and Microsoft 365 for Enterprise is the number of users allowed to utilize the subscription features. The business plan allows up to 300 users, while the enterprise enables unlimited users. If you have a small business, we recommend you purchase a Microsoft 365 for business subscription. However, if your company is 200 people or more and growing quickly, we recommend purchasing a Microsoft 365 for enterprise subscription.
Regardless of what subscription plan you choose, your business will be able to work with world-class productivity tools. It’s important to note that Microsoft 365 Business Basic only offers the web versions of Office 365 apps. This means that apps like Word, Excel, PowerPoint, Teams, Outlook, and SharePoint are only available when you have an internet connection. The rest of the subscription plans will include downloadable versions of these popular apps.
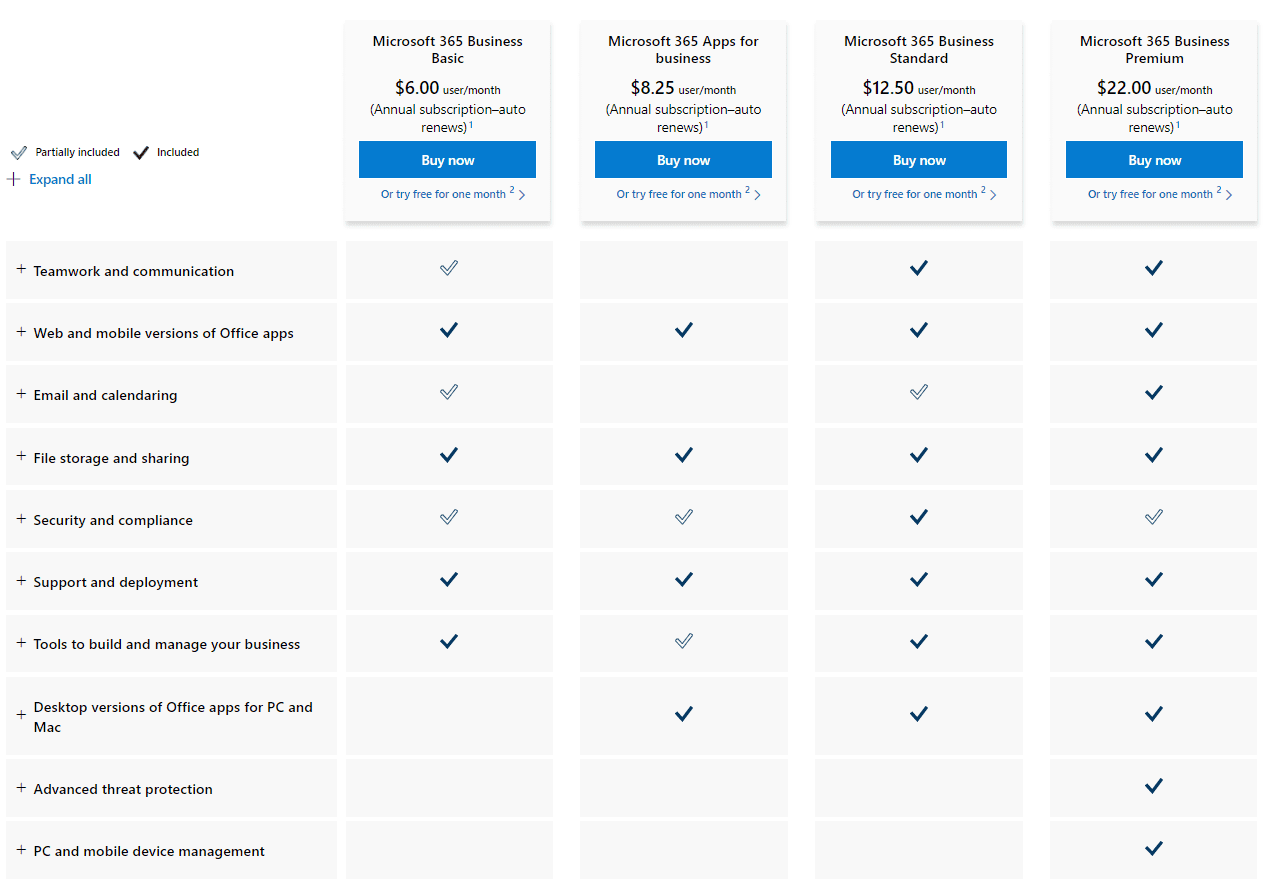
If you’re curious about the capabilities of each plan or if you want to try it before you buy, Microsoft also offers a month-long trial for each subscription. The trials have all features of the paid versions, with a cap of 25 users, and will automatically convert to a paid platform at the end of the month. If you’re still unsure what plan to choose, take this quiz to see what Microsoft suggests.
Step 2: Accessing your Microsoft 365 features
After selecting a plan and either paying for it or beginning a trial, Microsoft will redirect you to your Microsoft 365 admin center.
The Microsoft 365 admin center is your hub for creating new users, managing permissions and securities, and accessing Microsoft support. Microsoft has built-in tasks to help guide you through setting up your organization. Whether you’re entirely comfortable with setting up digital permission or this is your first time, Microsoft’s suggestions can help ensure crucial tasks are completed.
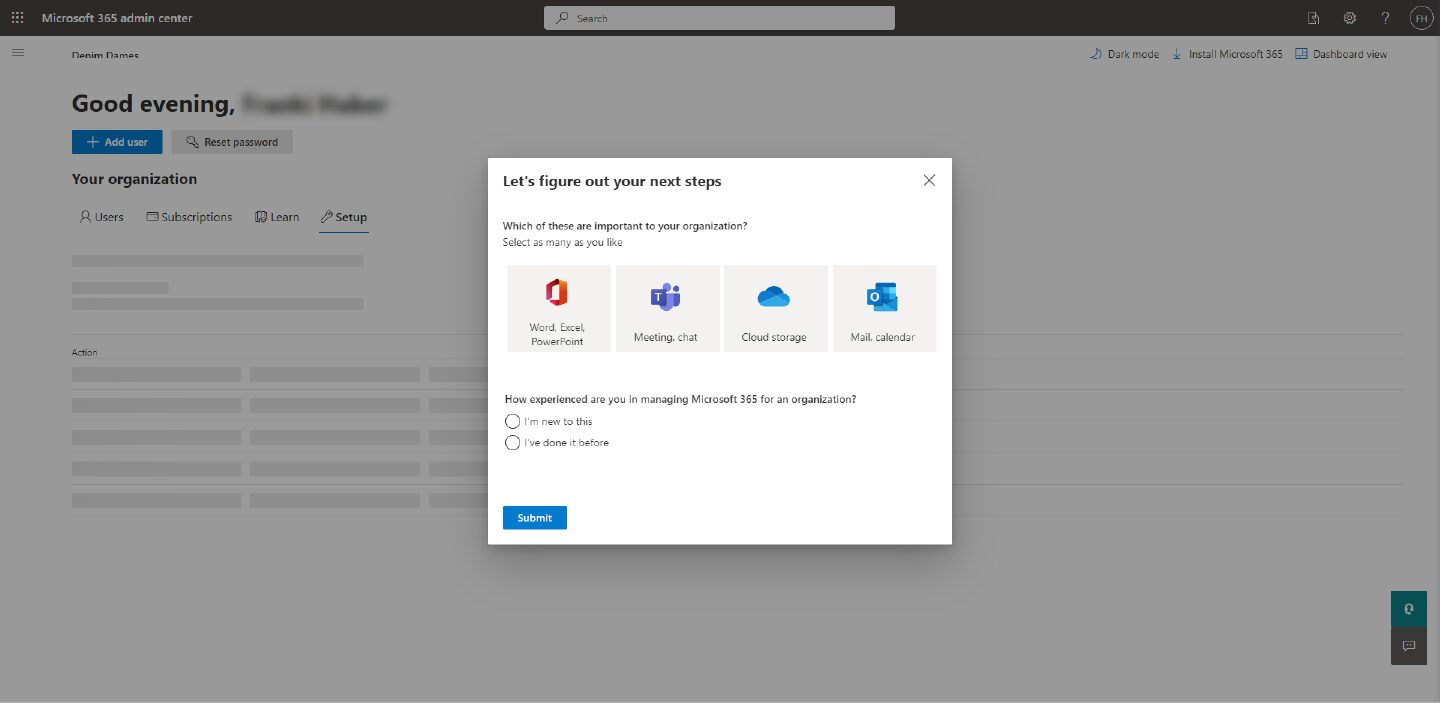
Once you’ve logged in to your admin center for the first time, a pop-up window will allow you to select the office apps most critical to your company. It will also let you inform Microsoft how much guidance you might need as an administrator.
After clicking the “Submit” button, Microsoft provides a list of essential set-up tasks that will help you immediately utilize your apps and licenses. You can click the “Install Office on your PC or Mac” task to get a download file for all your Office apps and follow the pop-up instructions from there.
Step 3: Adding users to your organization
Adding users is required to set up Microsoft 365 for your organization. Any users you add will be able to access Office apps either via the office.com site or direct downloads. You’ll also be able to assign roles to them and approve what devices they access your company’s data from.
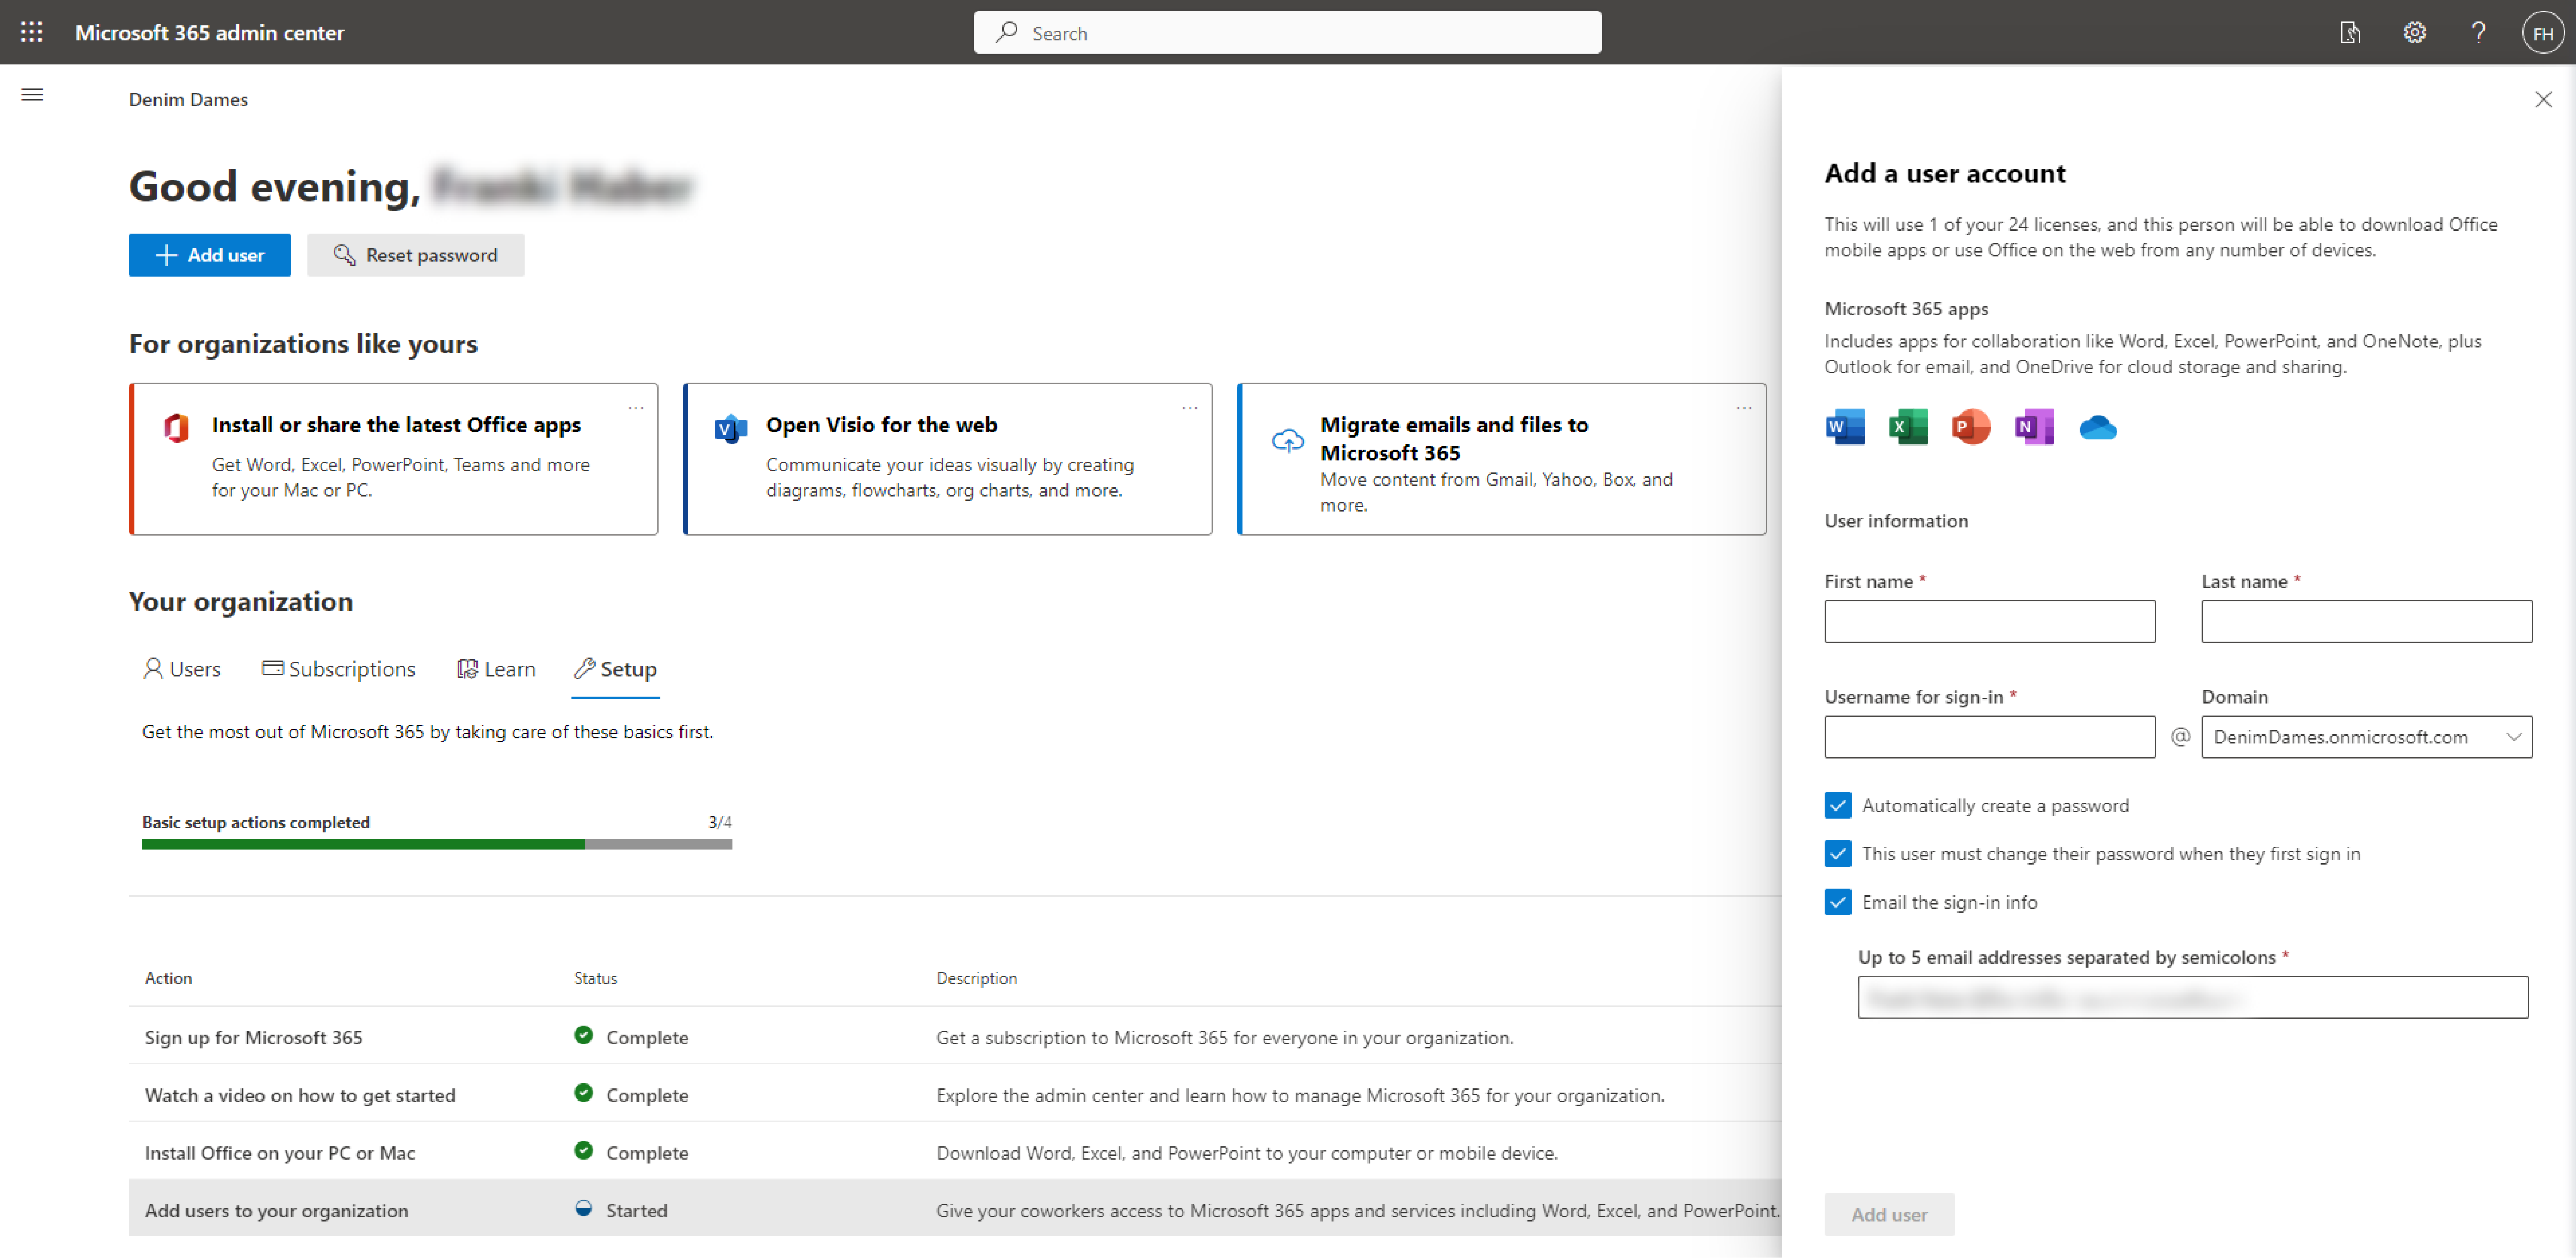
You’ll click on the “Add users to your organization” task to do this. Input their information into the pop-up screen on the right while making sure that the “Automatically create a password,” “This user must change their password when they first sign in,” and the “Email the sign-in info” checkboxes are all ticked. This will allow your user to access your company’s Microsoft licenses via email with a secure password and change it to their preferred password.
To see if the users have been successfully added to your organization, click the “≡” button in the upper left corner, then click the “Users” and “Active users” buttons. On this page, you’ll be able to manage the permissions and roles of your users.
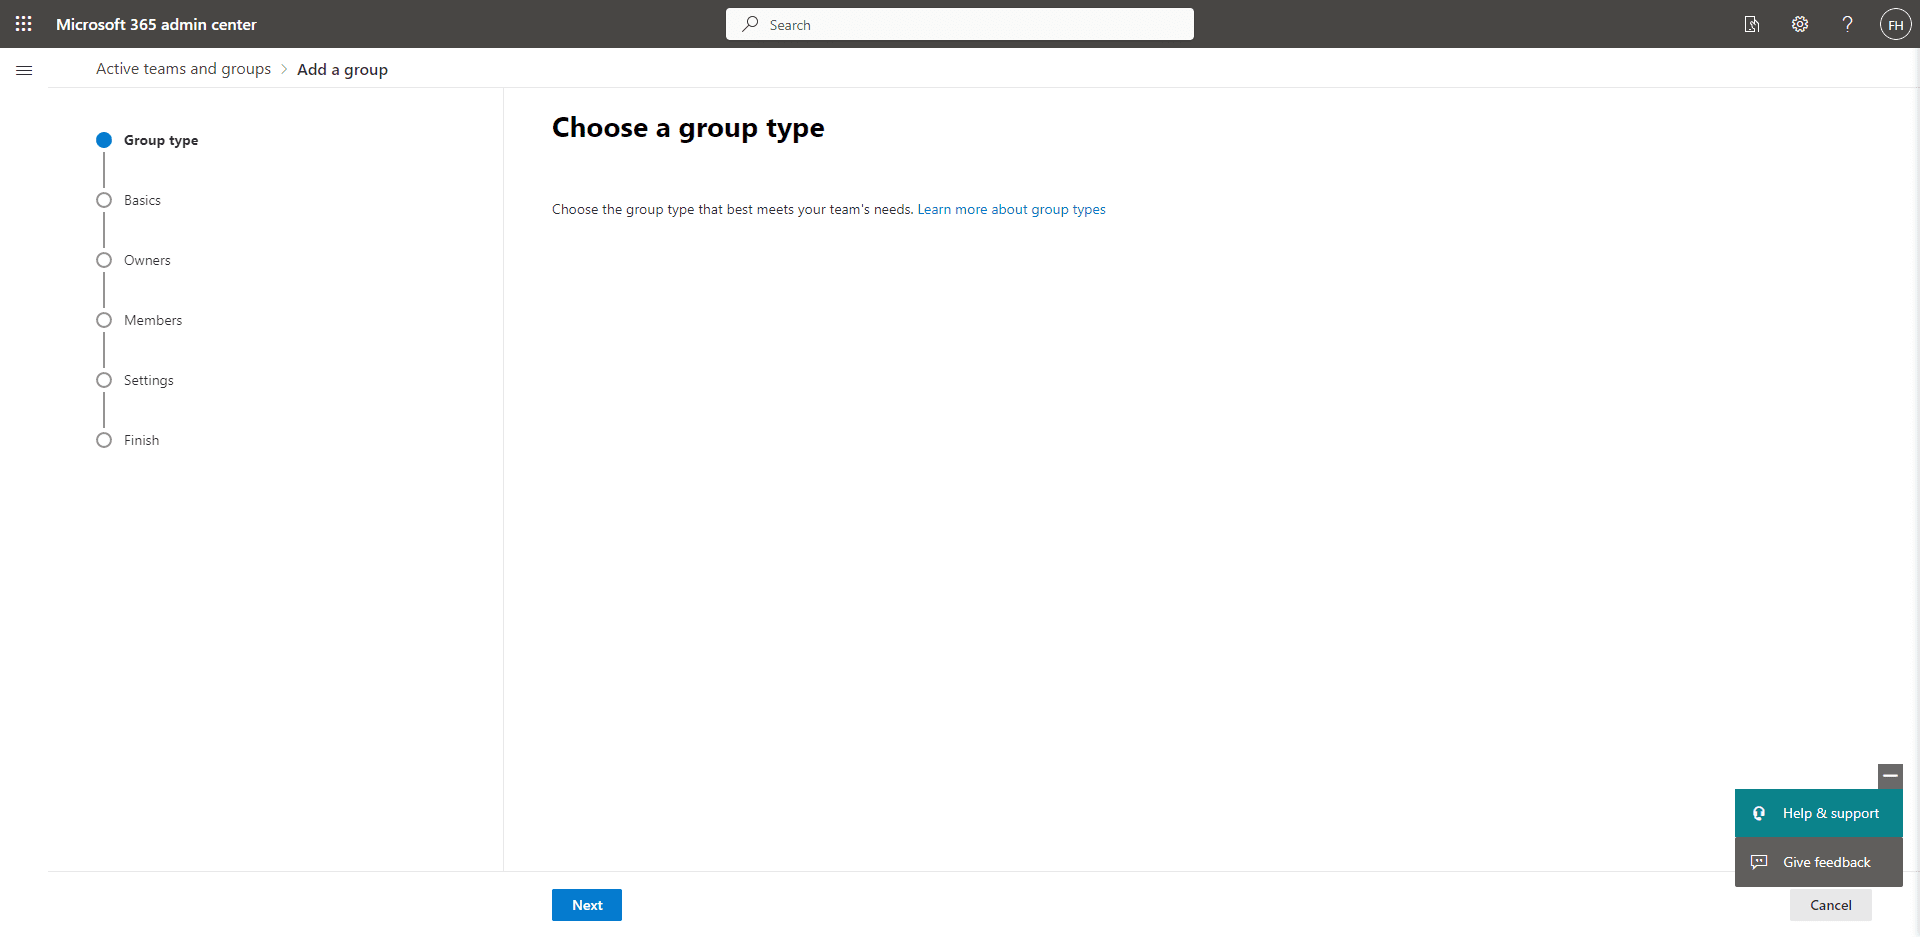
Optional Step 4: Manage User Roles
Depending on the size of your company, you may need multiple admins to help manage your organization. As all added users automatically have no administrator permissions, you’ll need to edit a user’s role to make them an admin. Fortunately, you can change this from the “Active users” page.
Click on the user you’d like to give administrator permissions to. Their profile will pop up on the right. Click the “Manage roles” link from here under the “Roles” section.
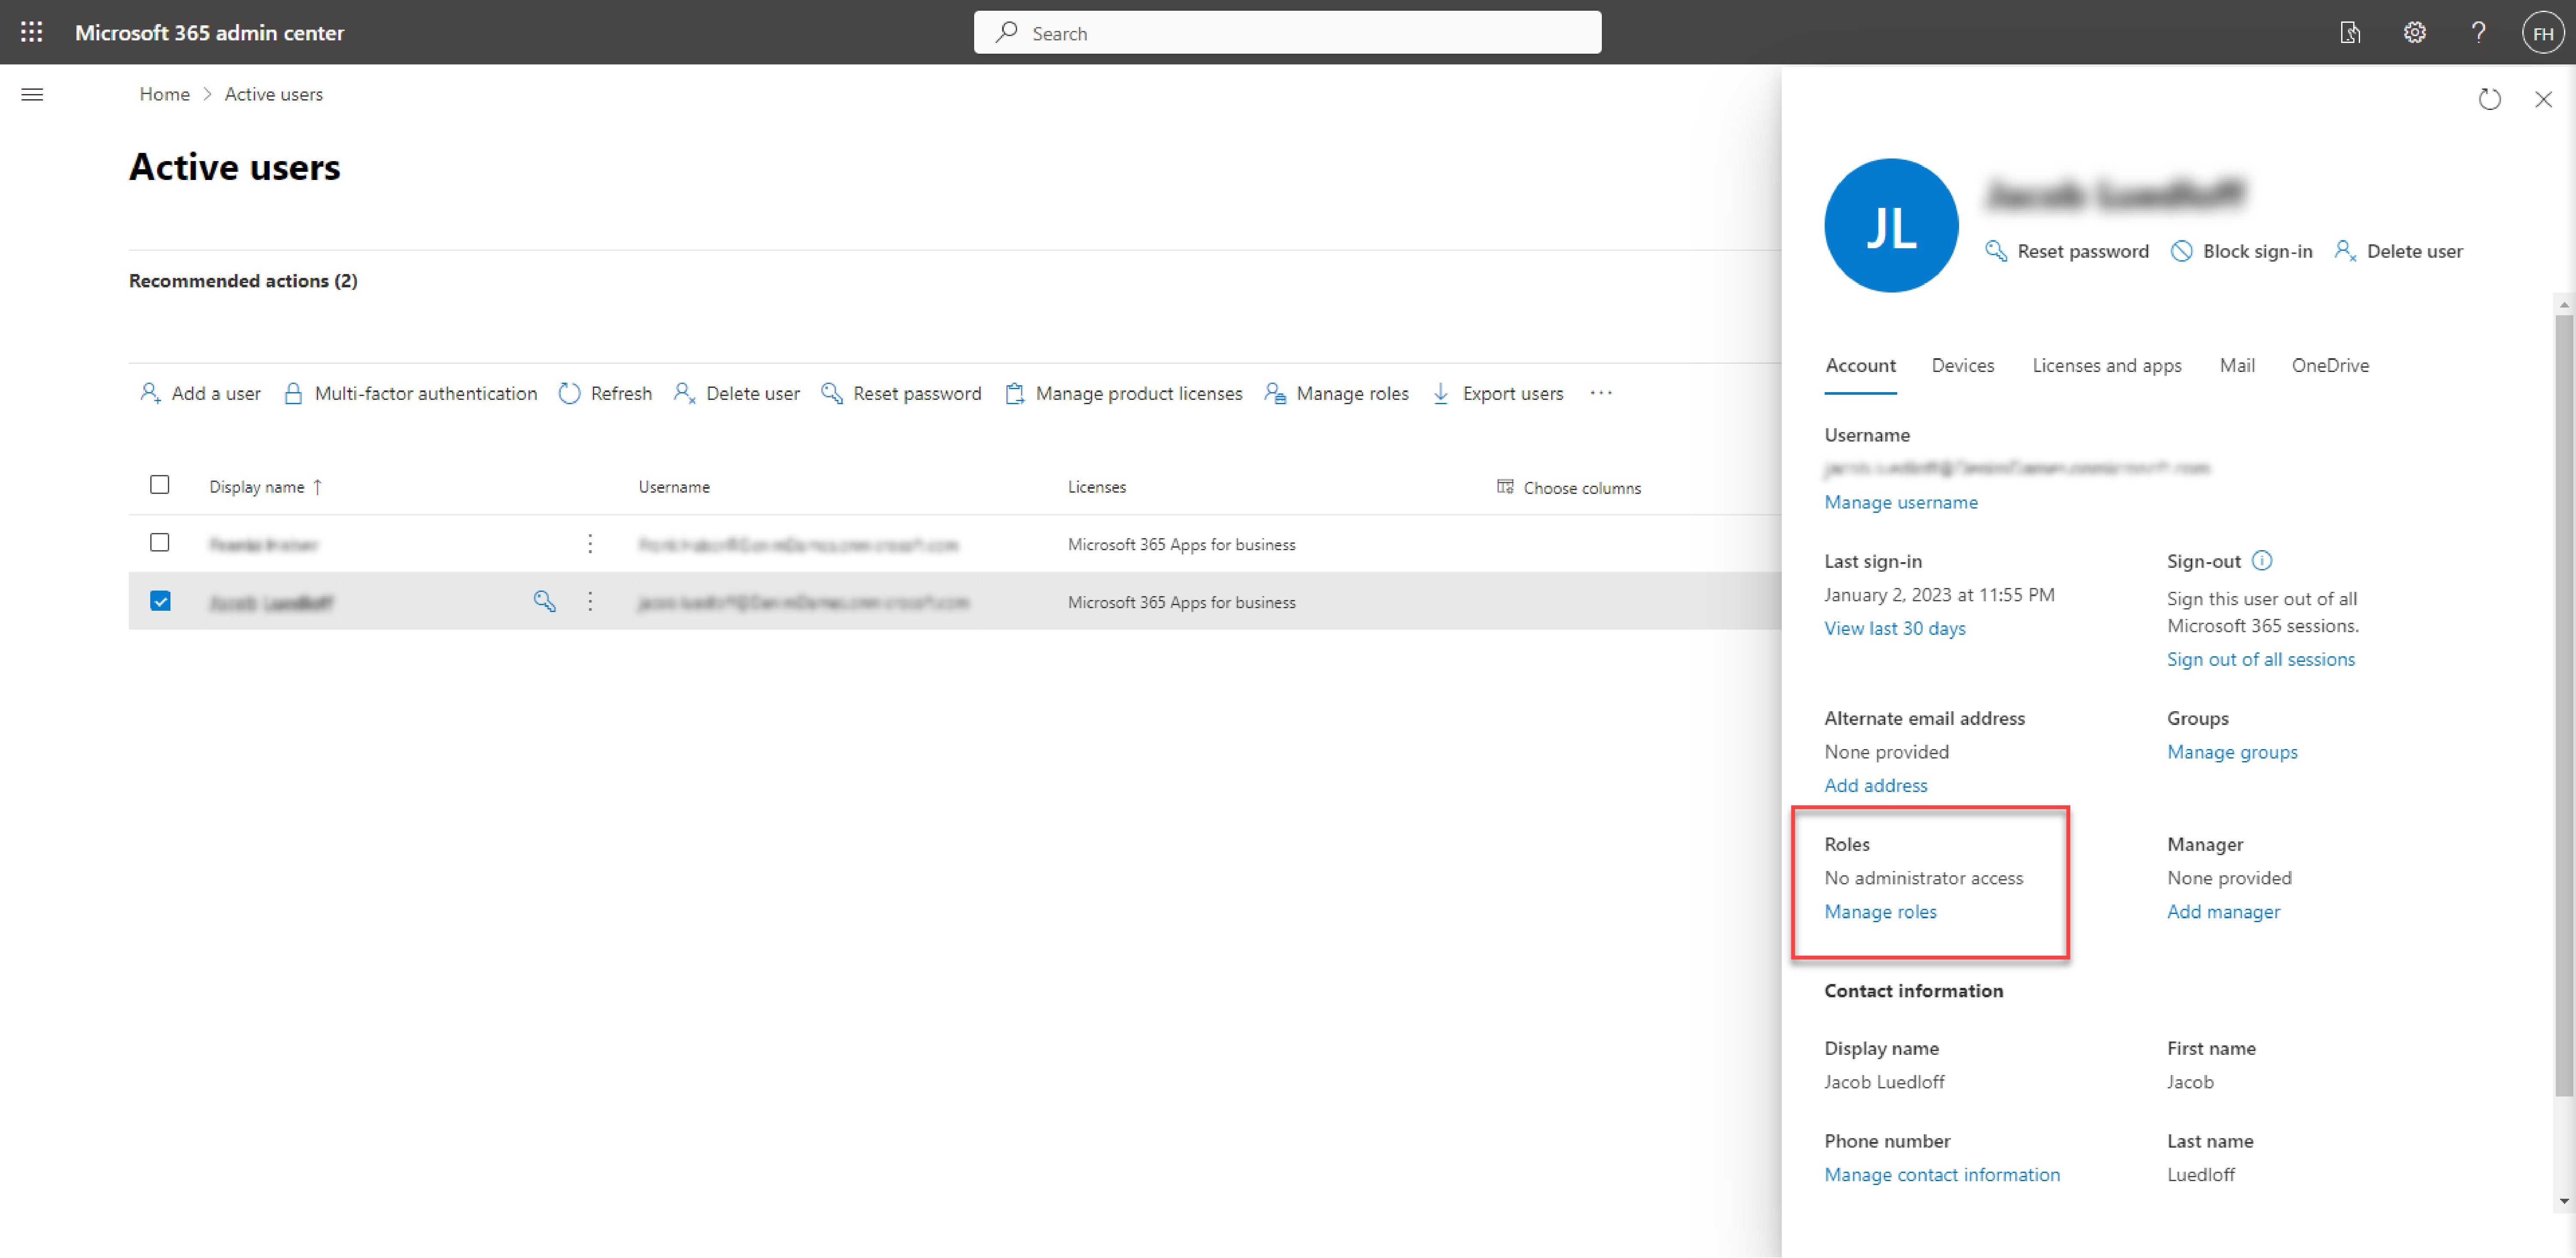
You’ll see that the “User (no admin center access)” button is currently selected. Click the “Admin center access” button and assign the administrator roles you want the user to have.
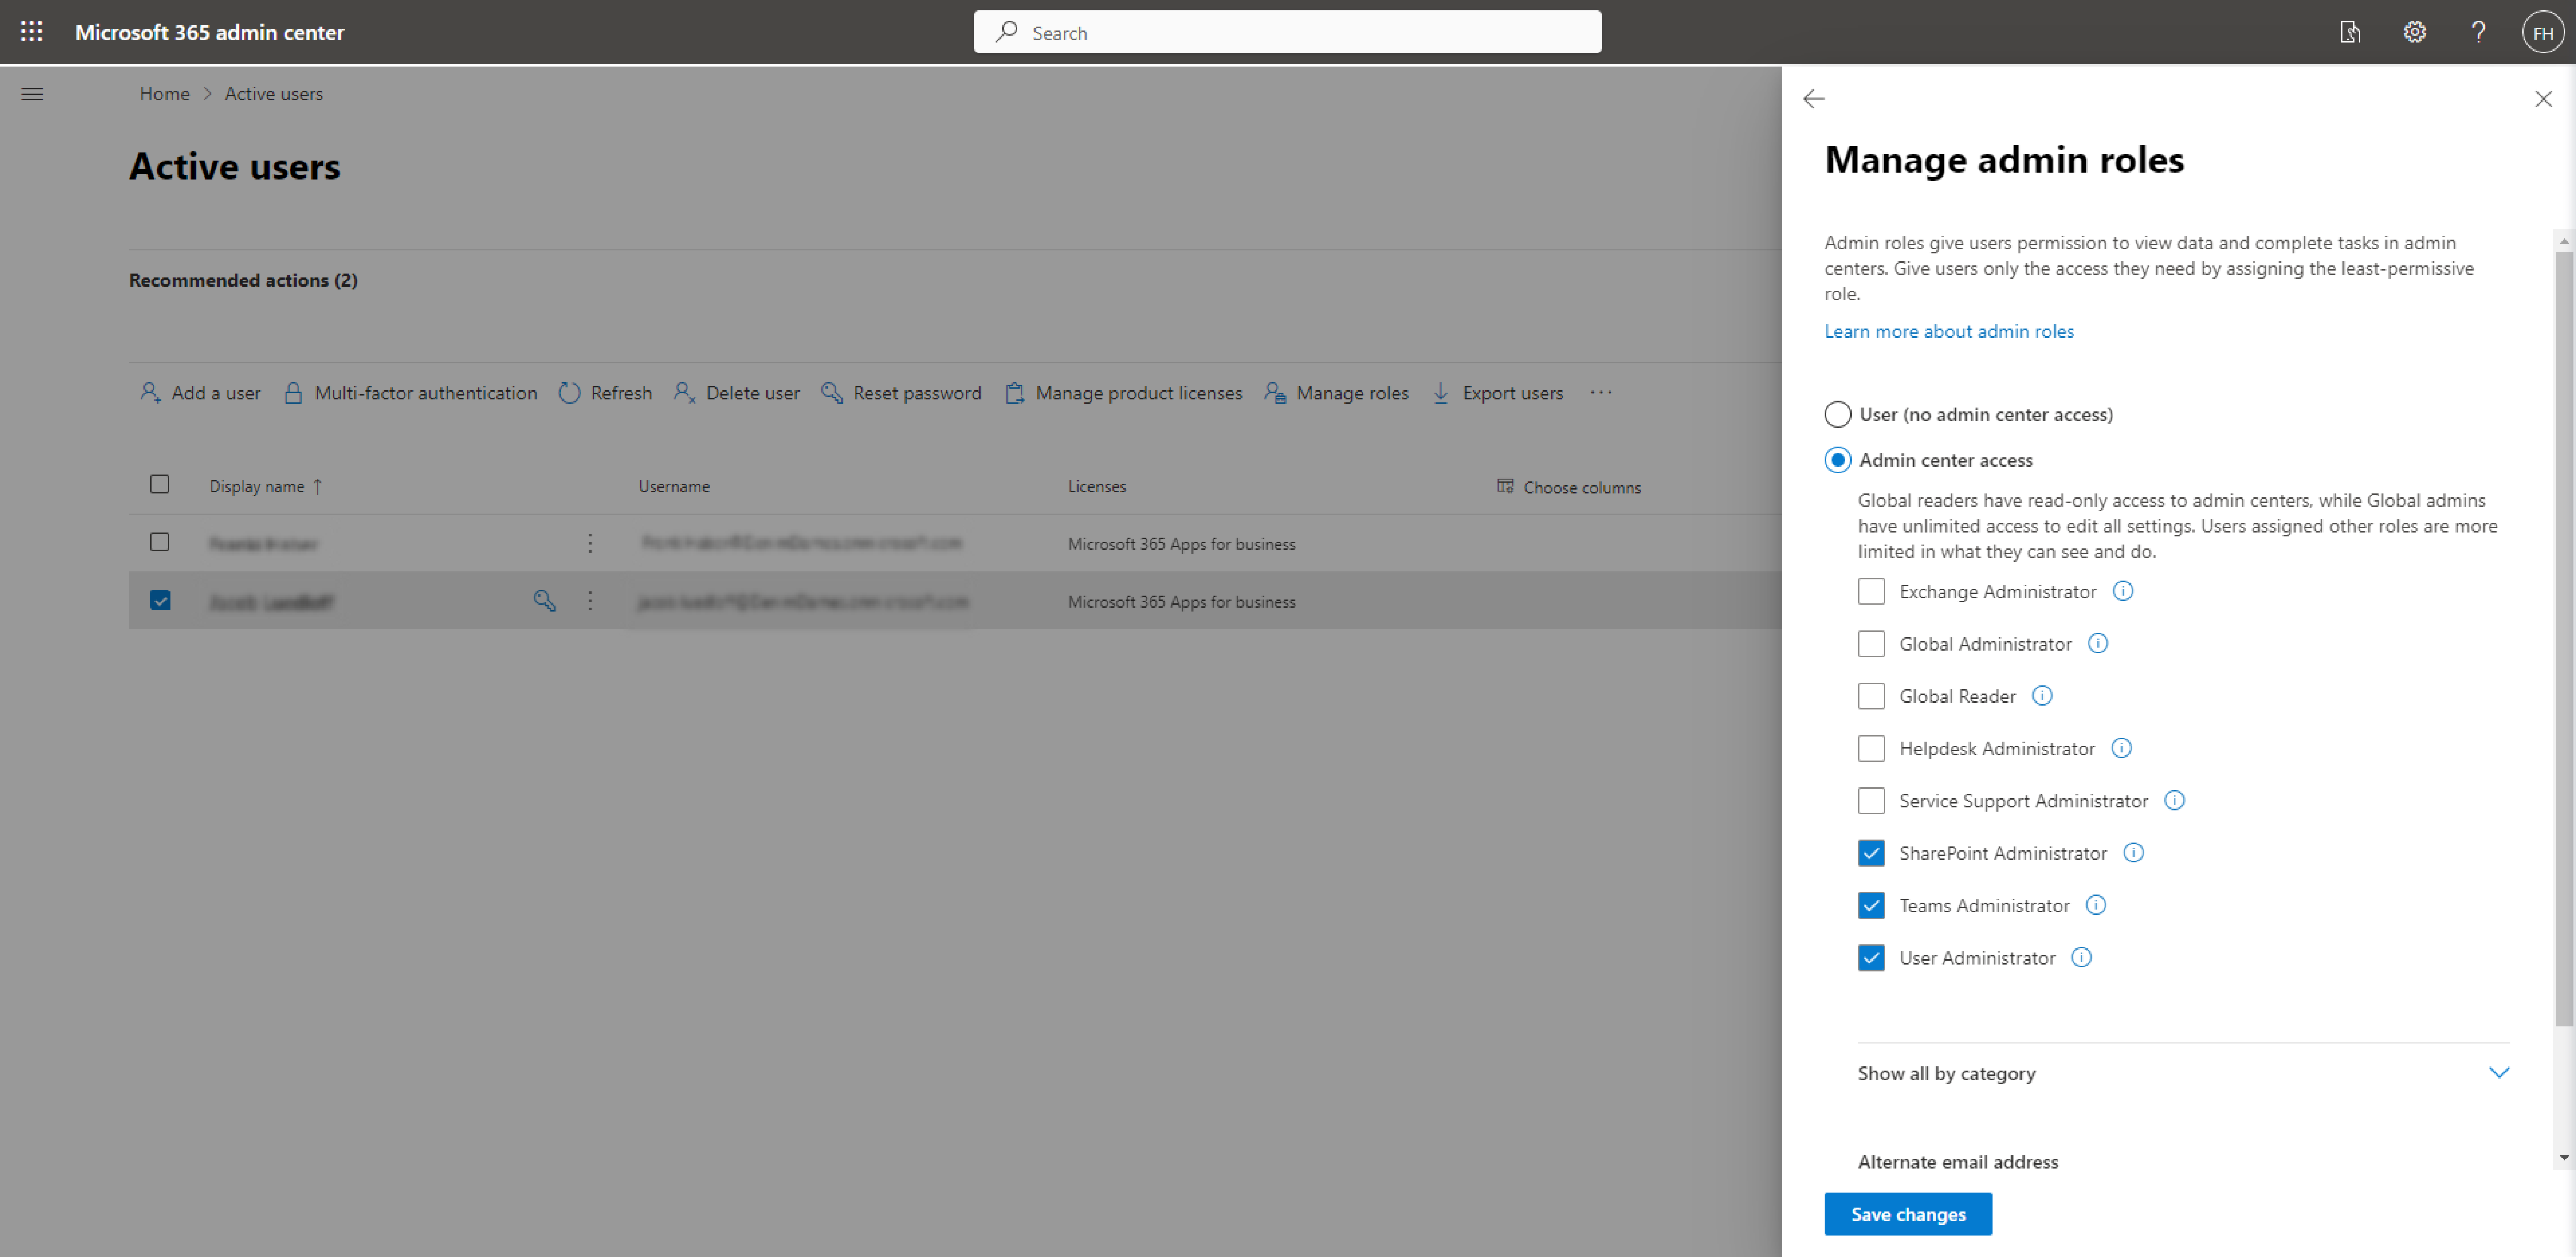
It’s important to note that the “Global Administrator” role will allow the user to access all parts of the Microsoft 365 admin center, including payment and subscriptions. Remember to assign this role sparingly.
Final notes on Microsoft 365
Microsoft 365 can be tailored to your business productivity needs regardless of your company’s size. With the Microsoft 365 admin center, you can manage your subscriptions, users, apps, roles, permissions, security, and cloud services such as SharePoint and OneDrive.
In a different post, we’ll cover how to create a custom domain to connect to your Microsoft 365 account for maximum customization and control over your business platform.
Given how many features Microsoft 365 provides, there is a wealth of information available regarding best practices and functionalities on the Microsoft Learn and Microsoft Docs sites. But to get the best advice on setting up your Microsoft 365 products and Azure tenant, contact EvergreenWorx today!


